Invite Supplier
Invite Supplier
Invite Supplier
Invite Supplier
Possible Duplicates
Update Company Details
Terms and Conditions
Available Companies
Select the listing you wish to view or edit.
Video Recommendation
FAQs
If you're a Supplier, here are some FAQs
Adding relevant categories to your listing helps potential clients find your services more easily and improves your listing's visibility in search results. Follow these steps to add categories to your listing.
Step 1: Access Your Listing Settings
Navigate to your listing page and click the Gear icon (settings icon) to edit and manage your listing.

---
Step 2: Navigate to the Categories Tab
Once in the settings menu, locate and click on the "Categories" tab to access the category management section.

---
Step 3: Add New Categories
In the Categories section, click the "Add New" hyperlink text to begin adding categories to your listing.

---
Step 4: Browse Available Categories
You'll see a list of available categories displayed on the screen. Review the categories that are relevant to your business and services.

---
Step 5: Search Specific Category or Select Categories from the List
Method 1 - Browse and Select:
-
Scroll through the category list
-
Check the box next to each category that applies to your business
-
You can select multiple categories that are relevant to your services
Method 2 - Use Search Function:
-
If you have specific categories in mind, use the search bar at the top of the category list
-
Type keywords related to your business or services
-
Check the box next to the relevant categories that appear in the search results

---
Step 7: Save Your Category Selections
After selecting all the relevant categories for your listing:
-
Review your selected categories to ensure they accurately represent your business
-
Click the "Save" button to add the categories to your listing

---
Step 8: Verify Categories Added
Return to your listing overview page to confirm that your selected categories are now displayed on your listing and are helping to categorize your services properly.

---
Tips for Category Selection:
-
Choose relevant categories: Select only categories that truly represent your services
-
Don't over-categorize: Focus on your primary services rather than selecting too many categories
-
Review periodically: Update your categories as your business services evolve
Your listing is now properly categorized and more discoverable to potential clients searching for your specific services!
This step-by-step guide will walk you through editing all the customizable sections of your listing overview page.
Section 1: Editing Company Details
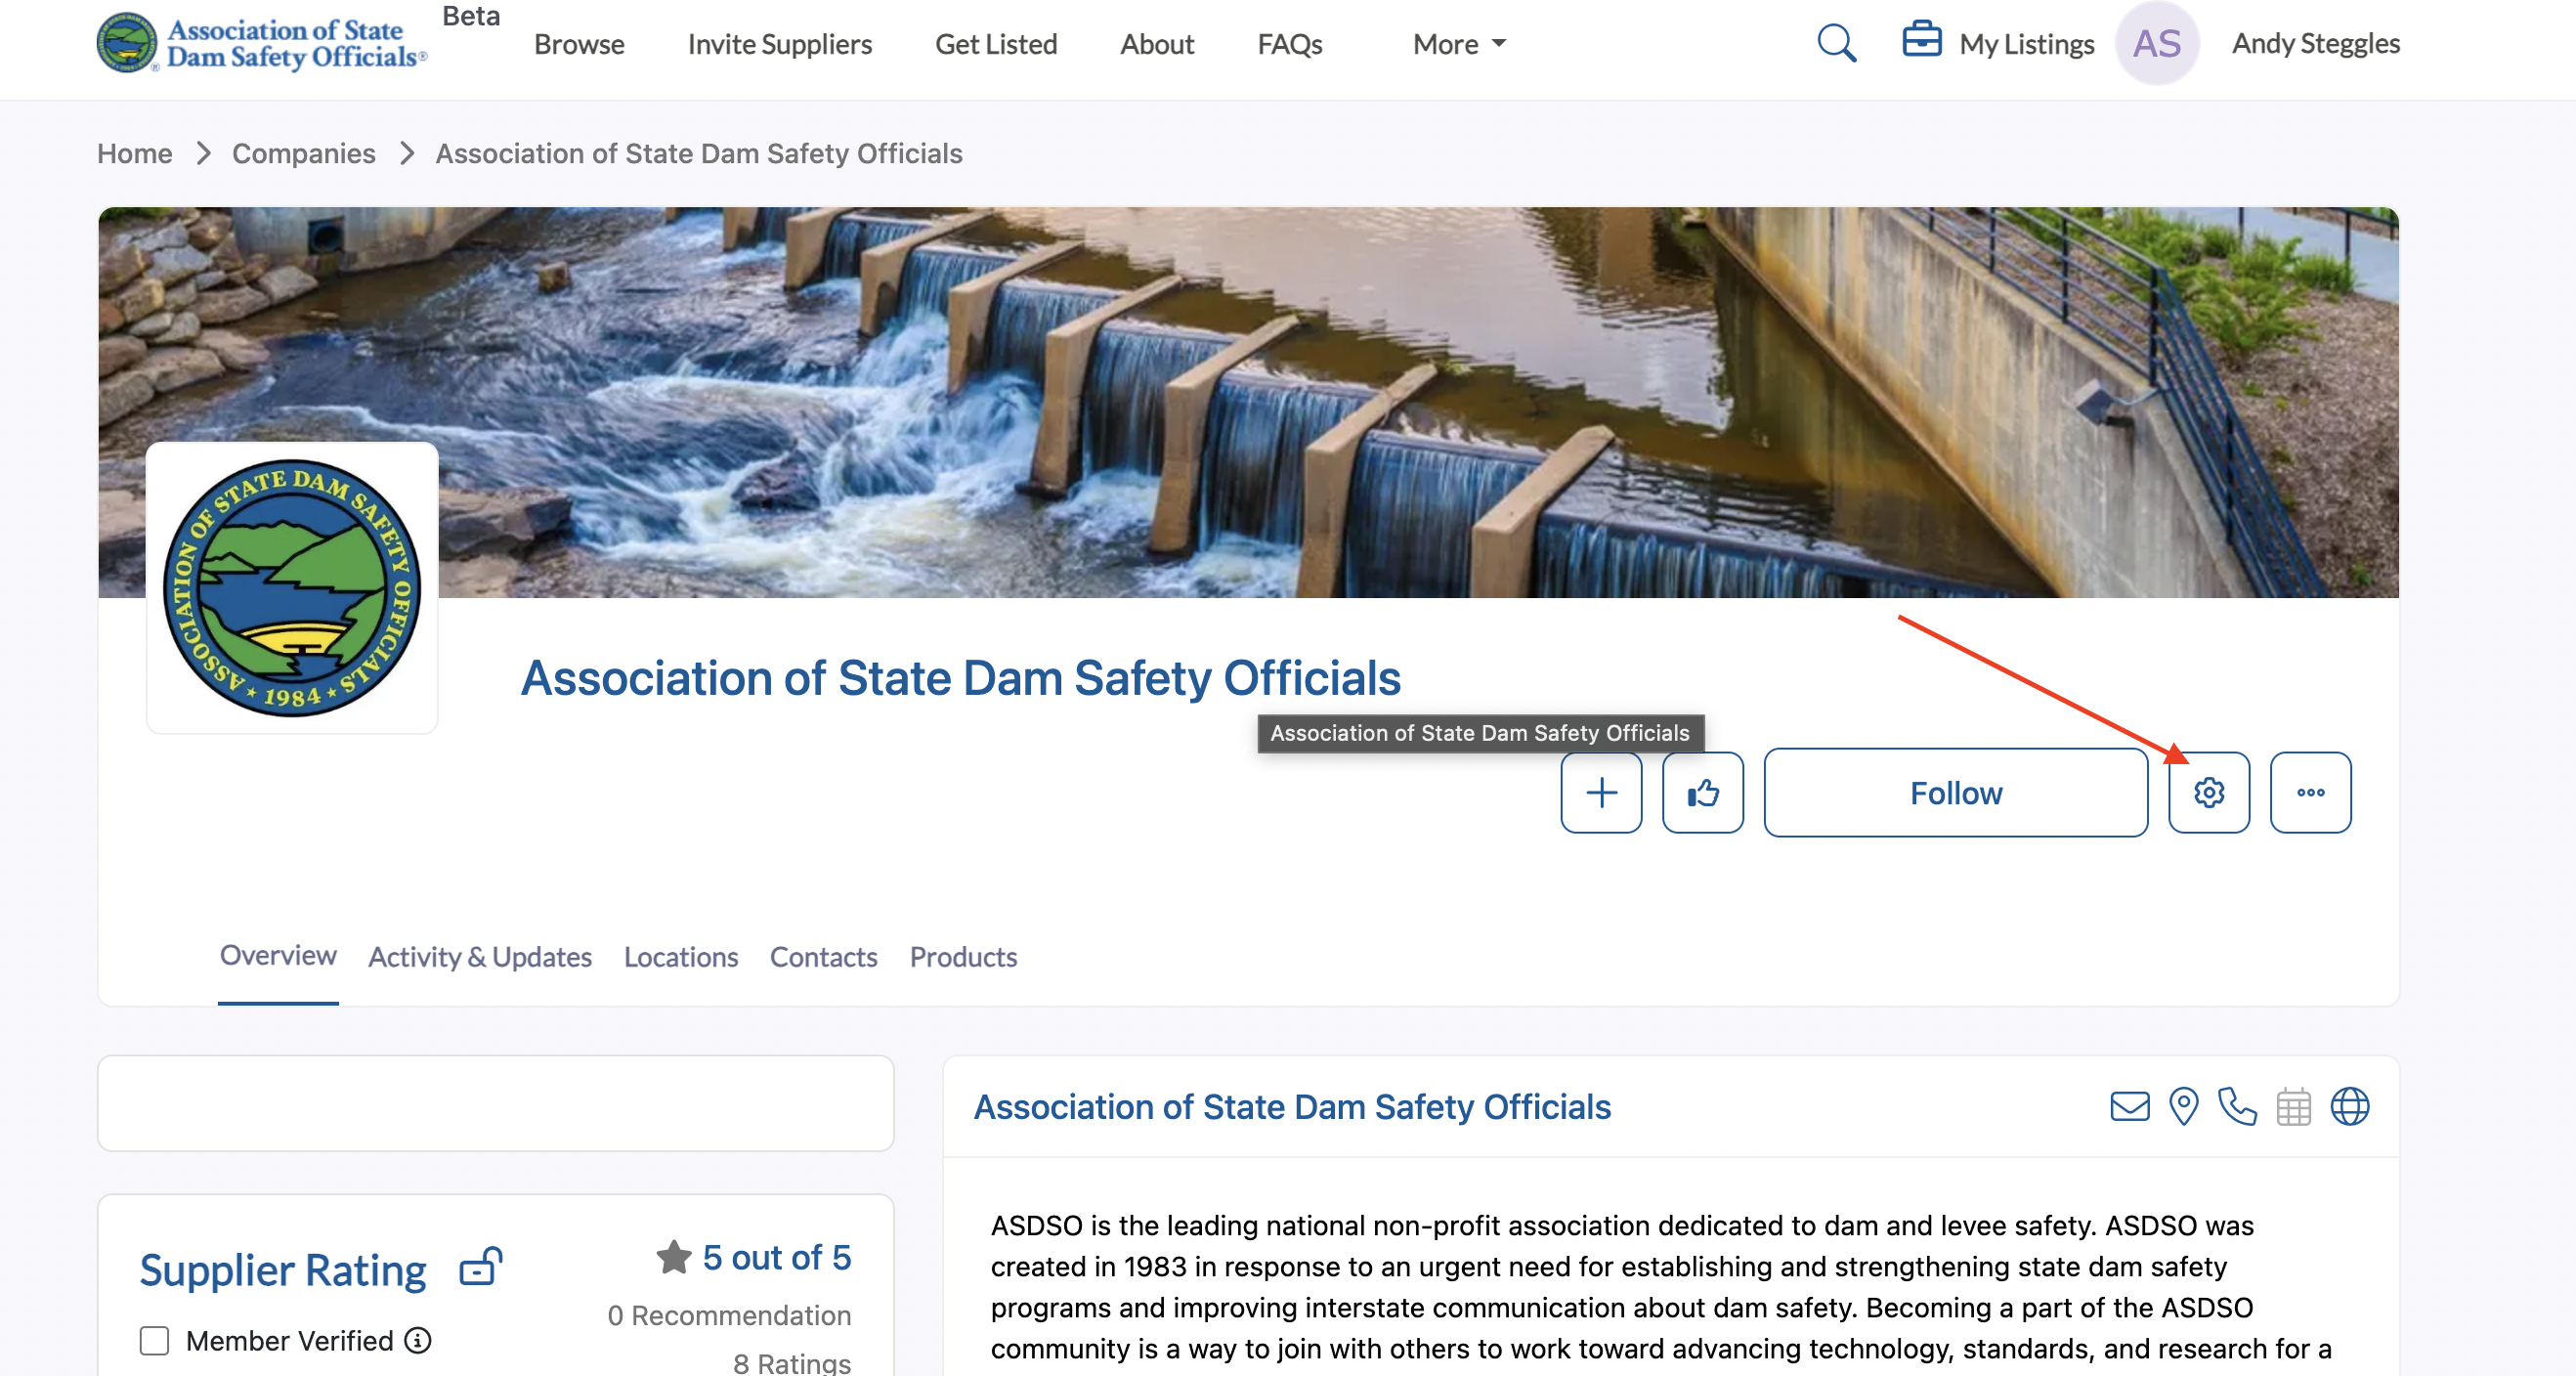
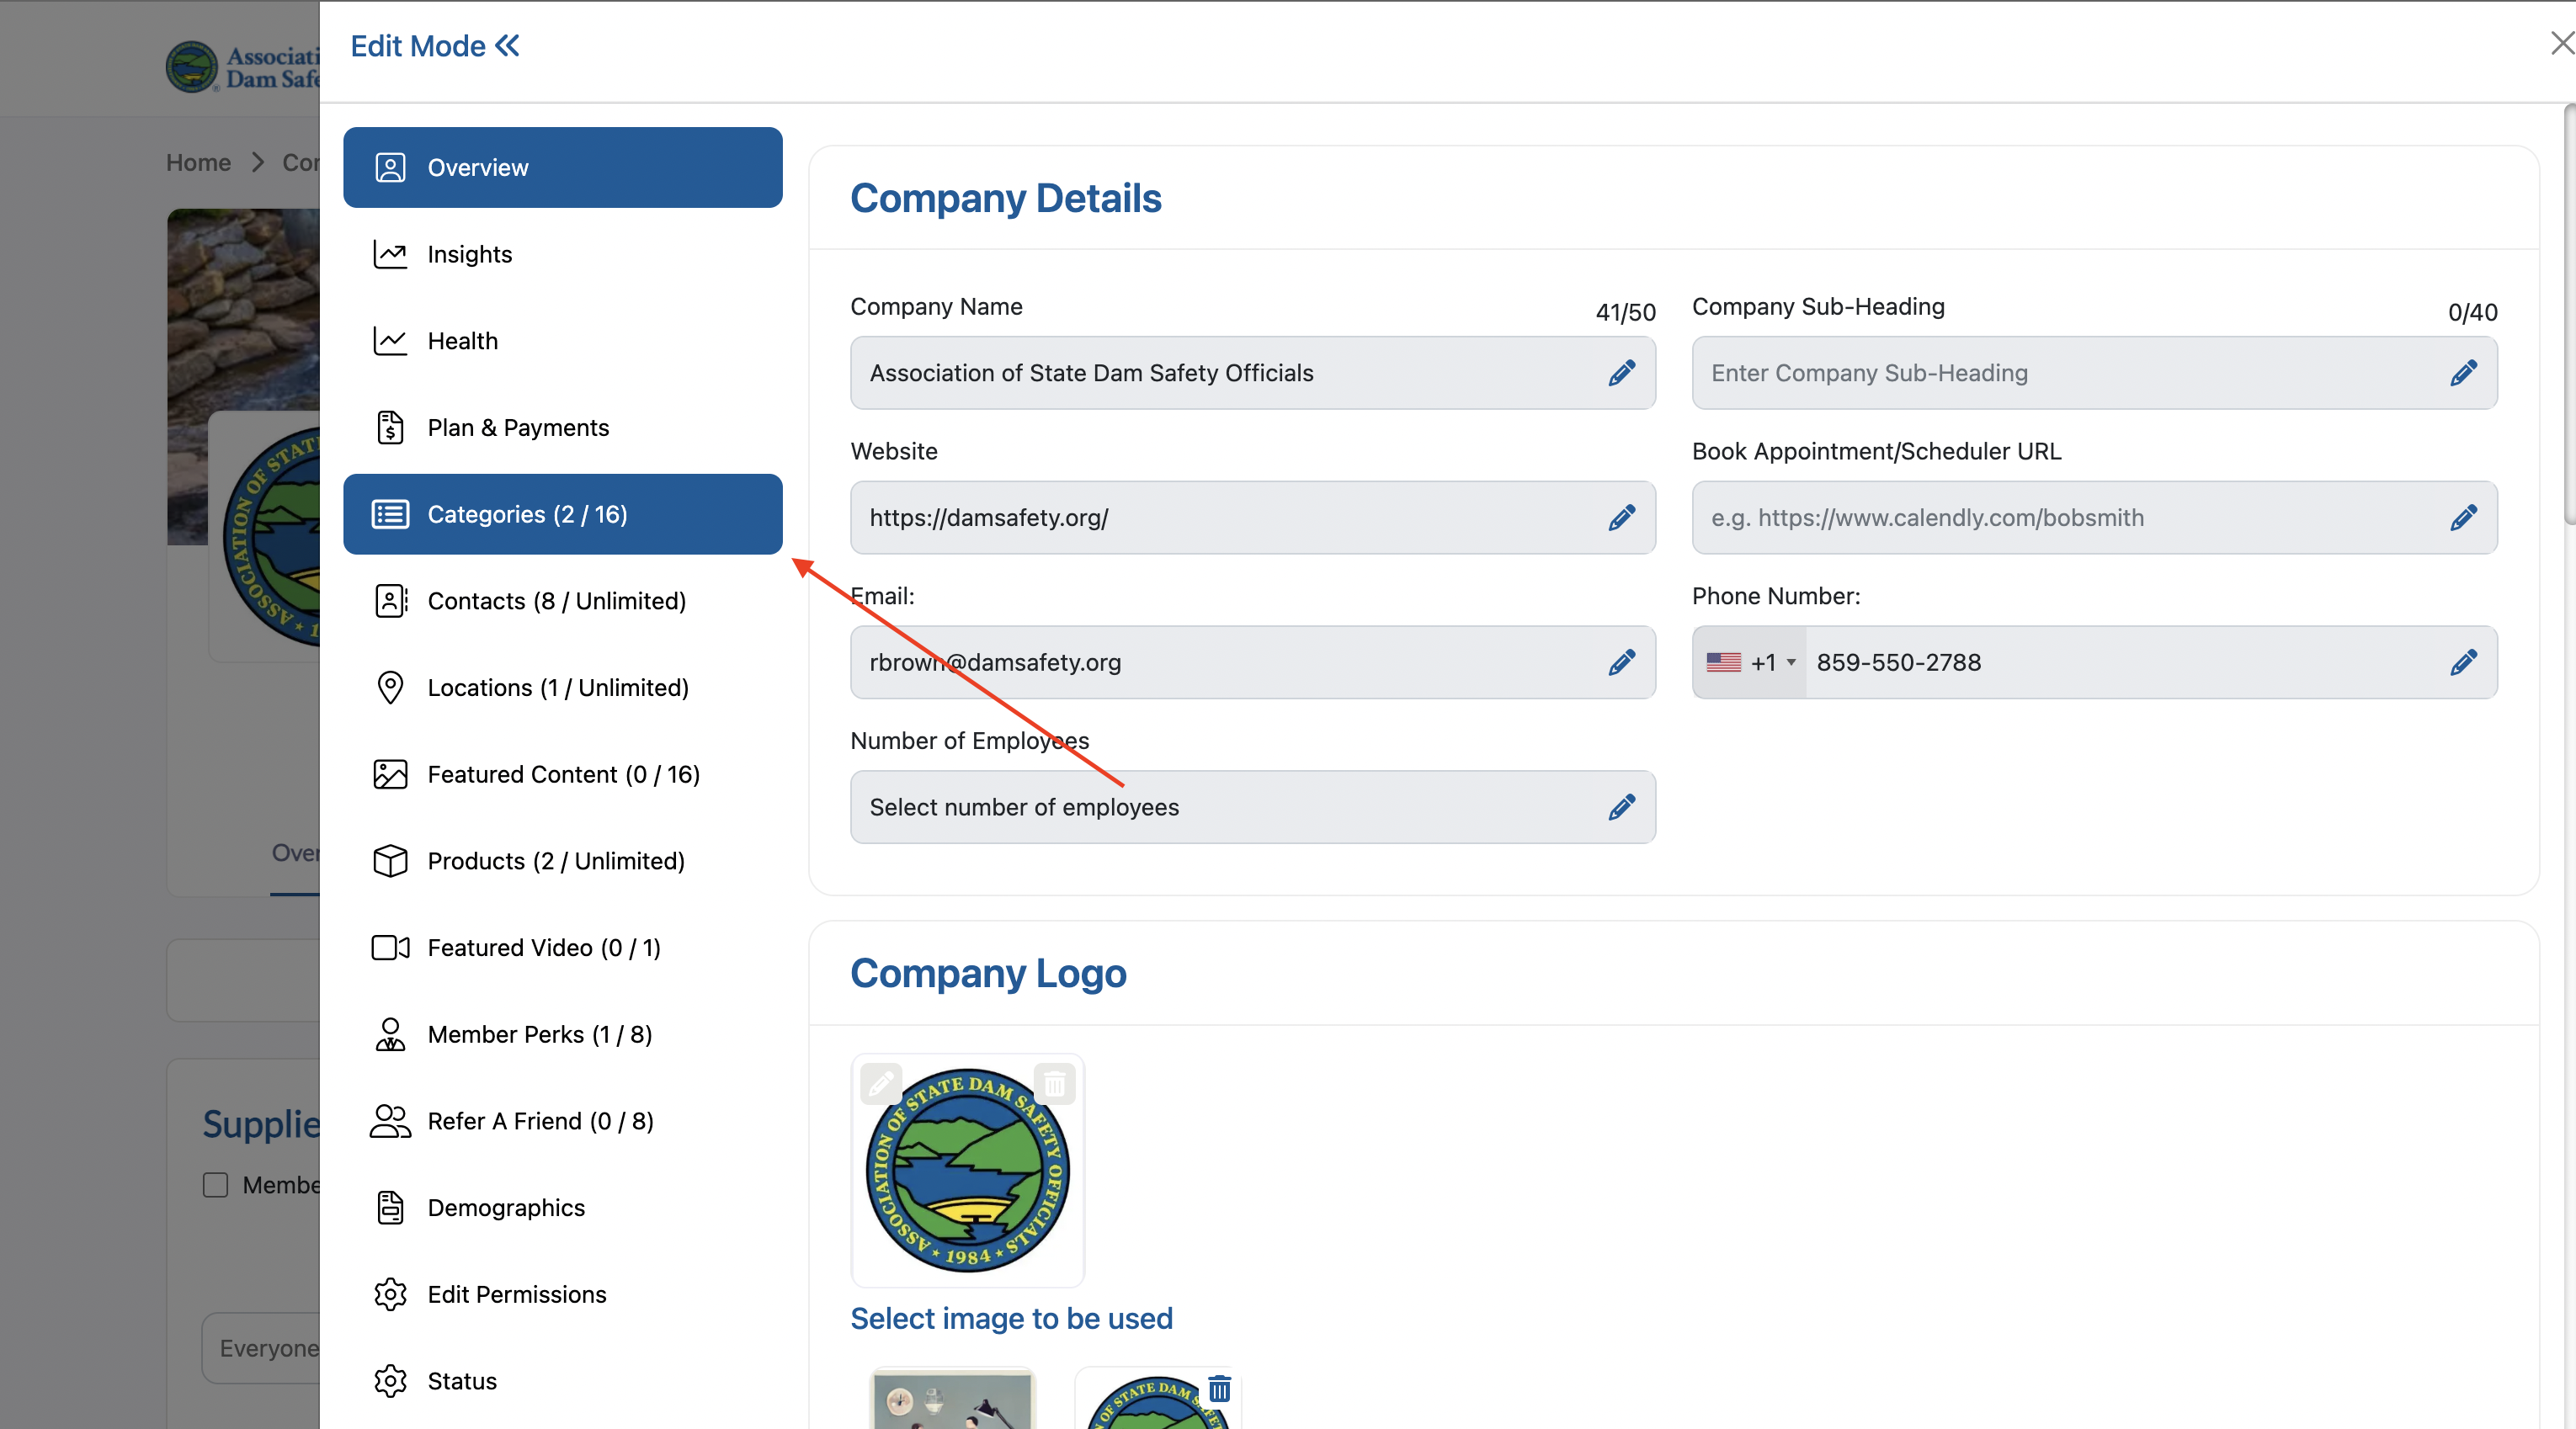
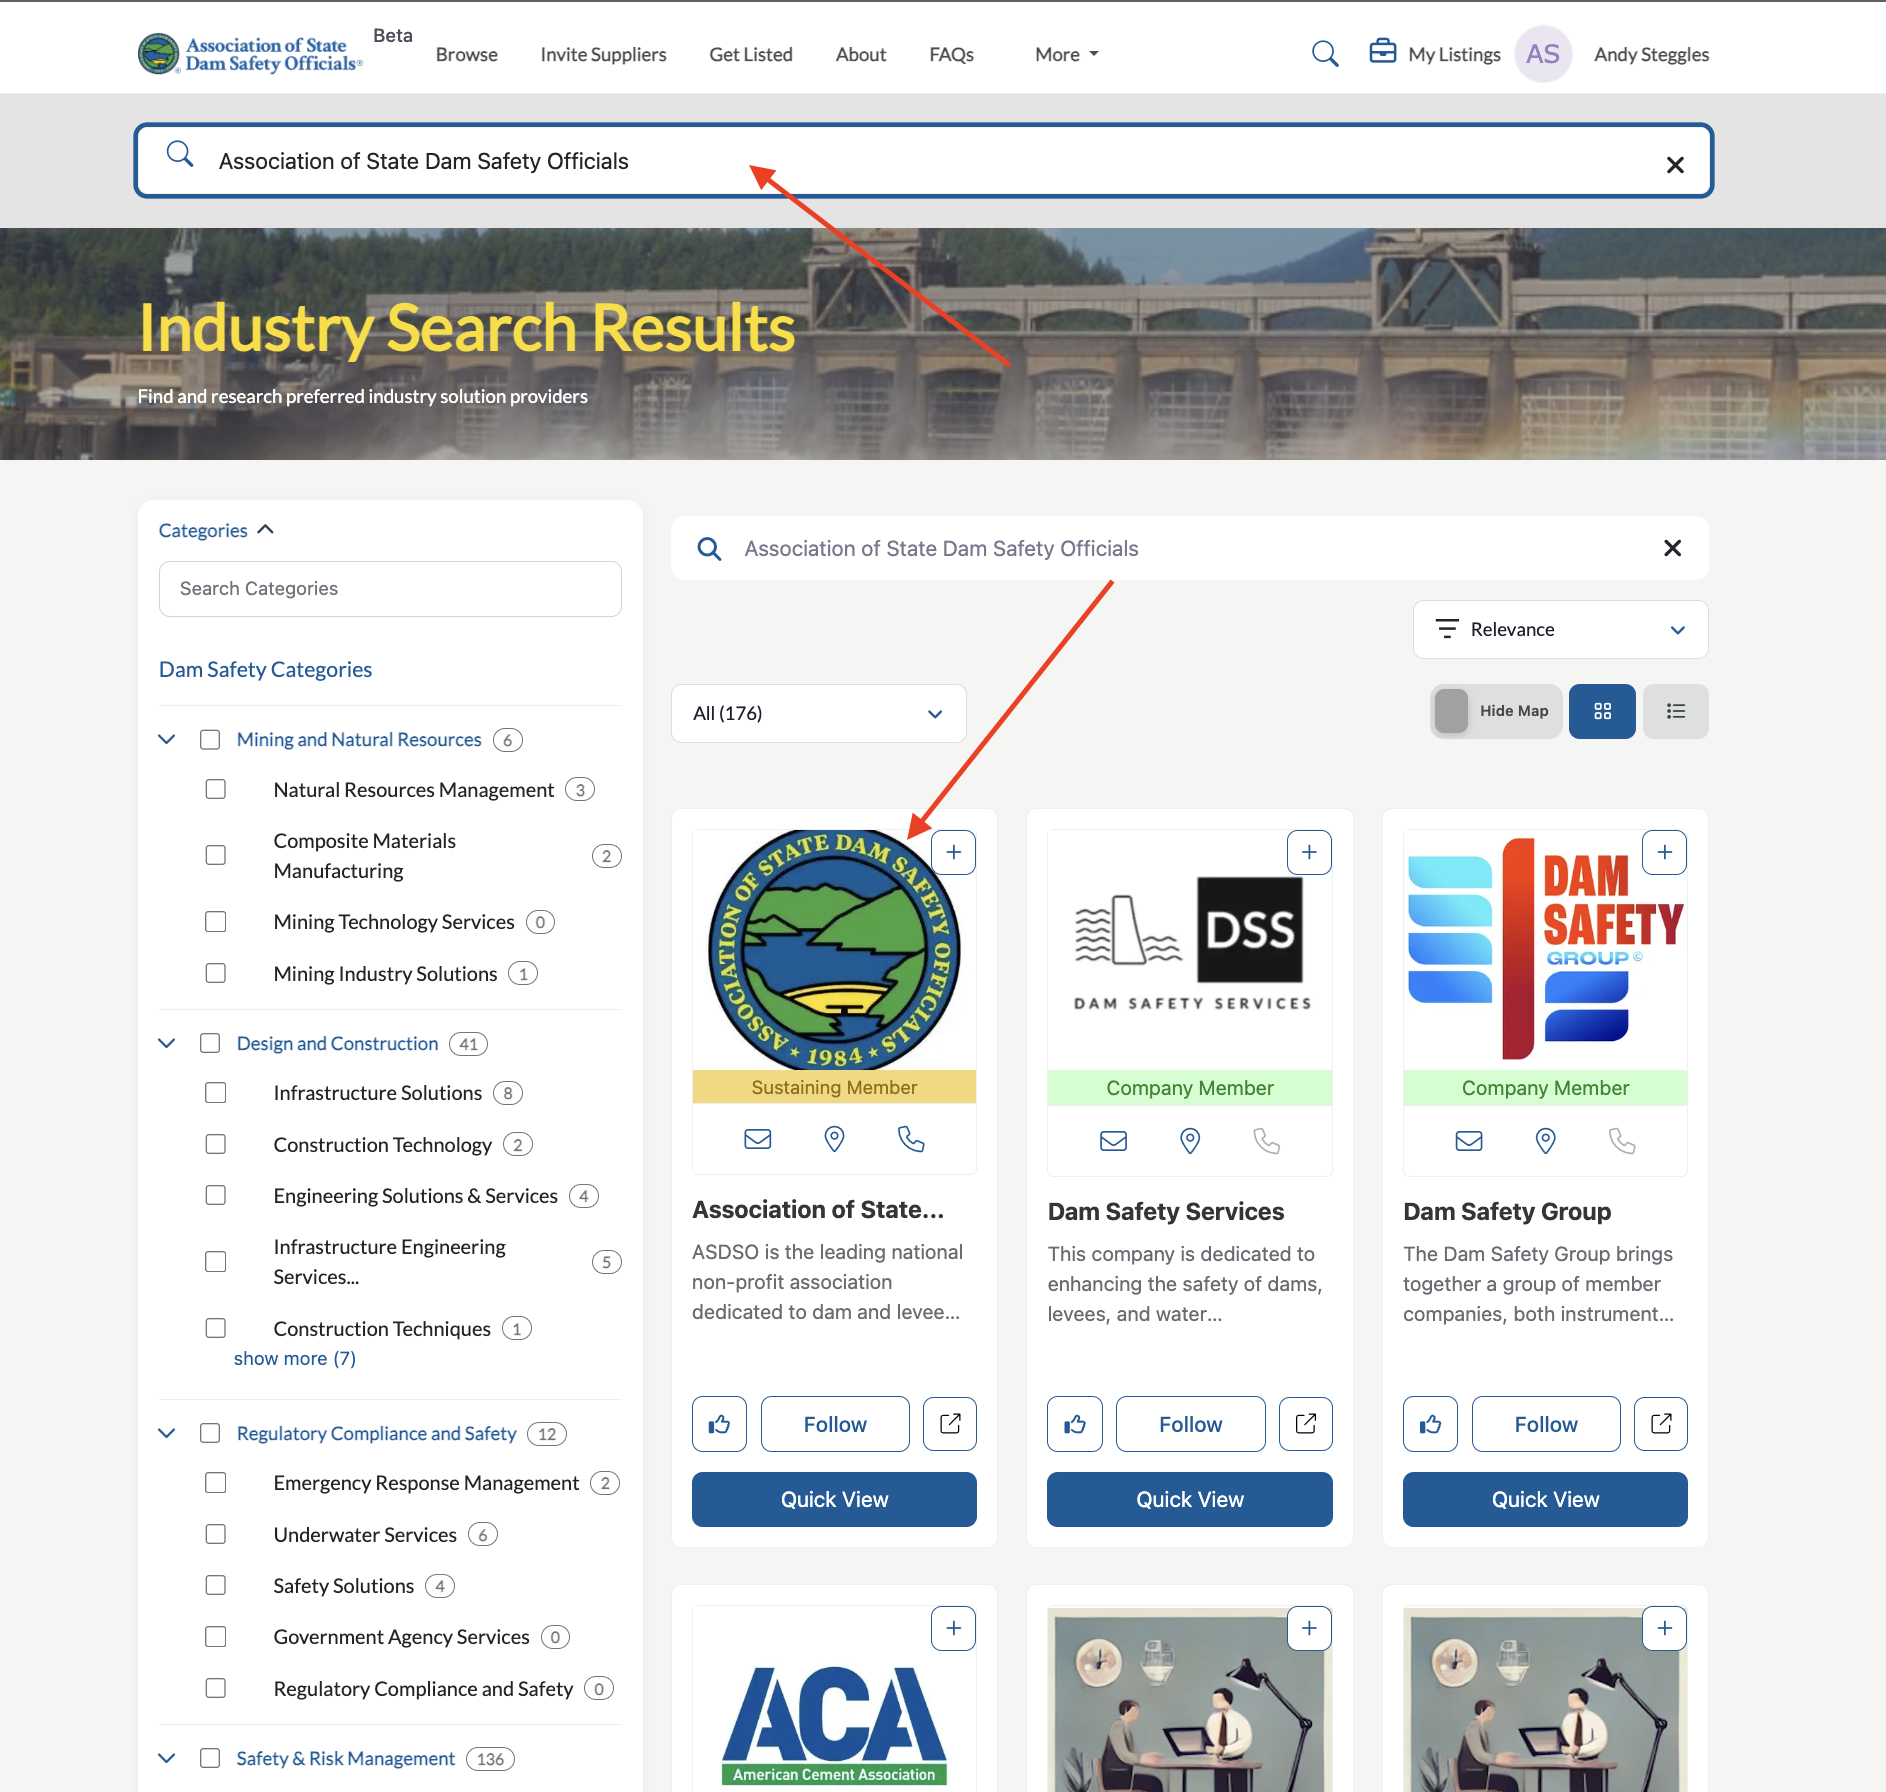
The company details section includes your company description, contact information, and other business details.

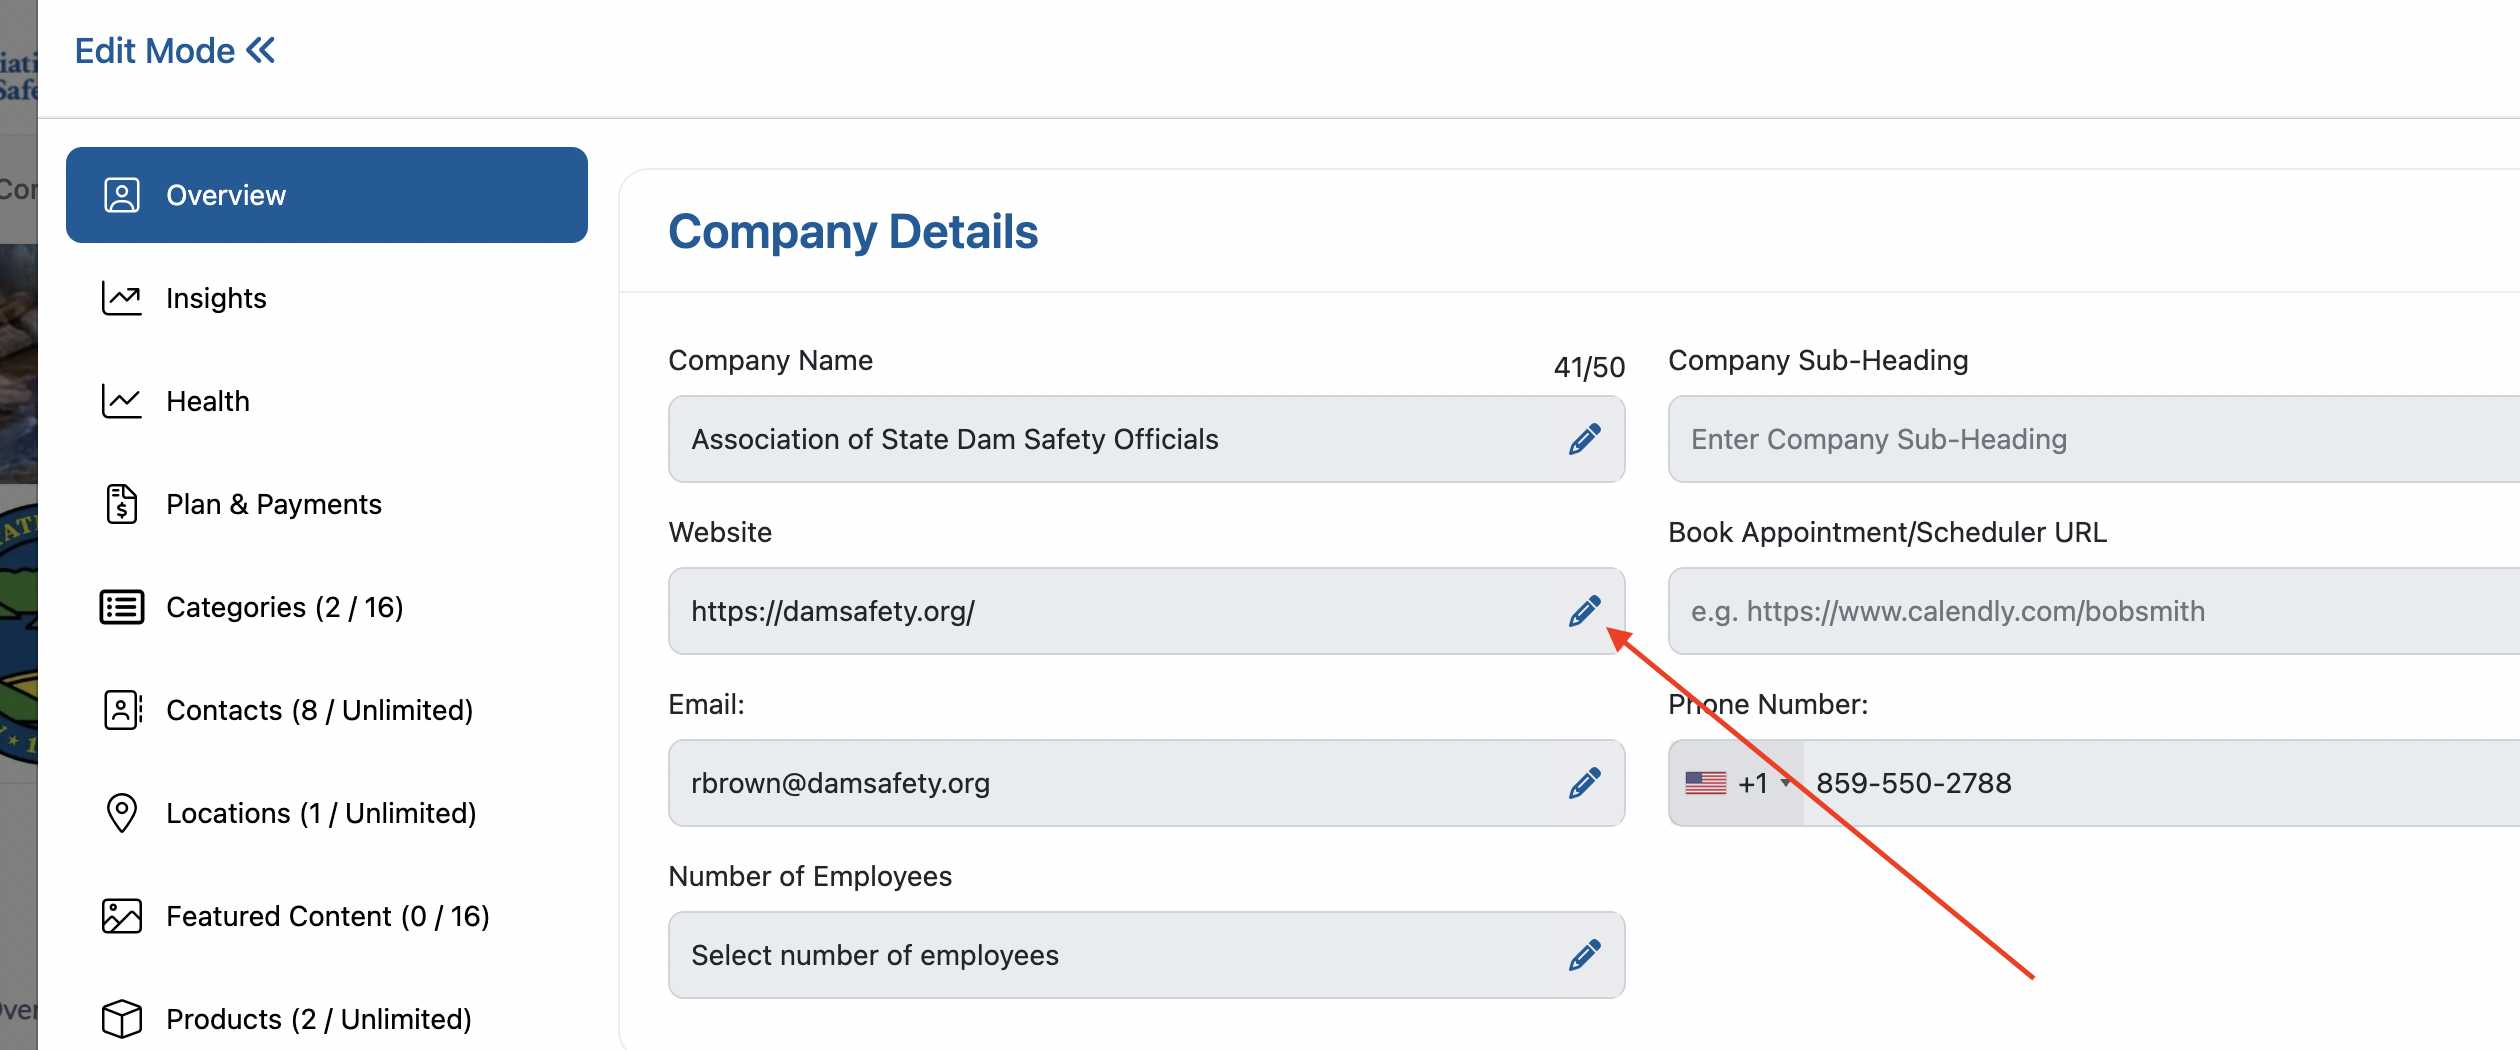
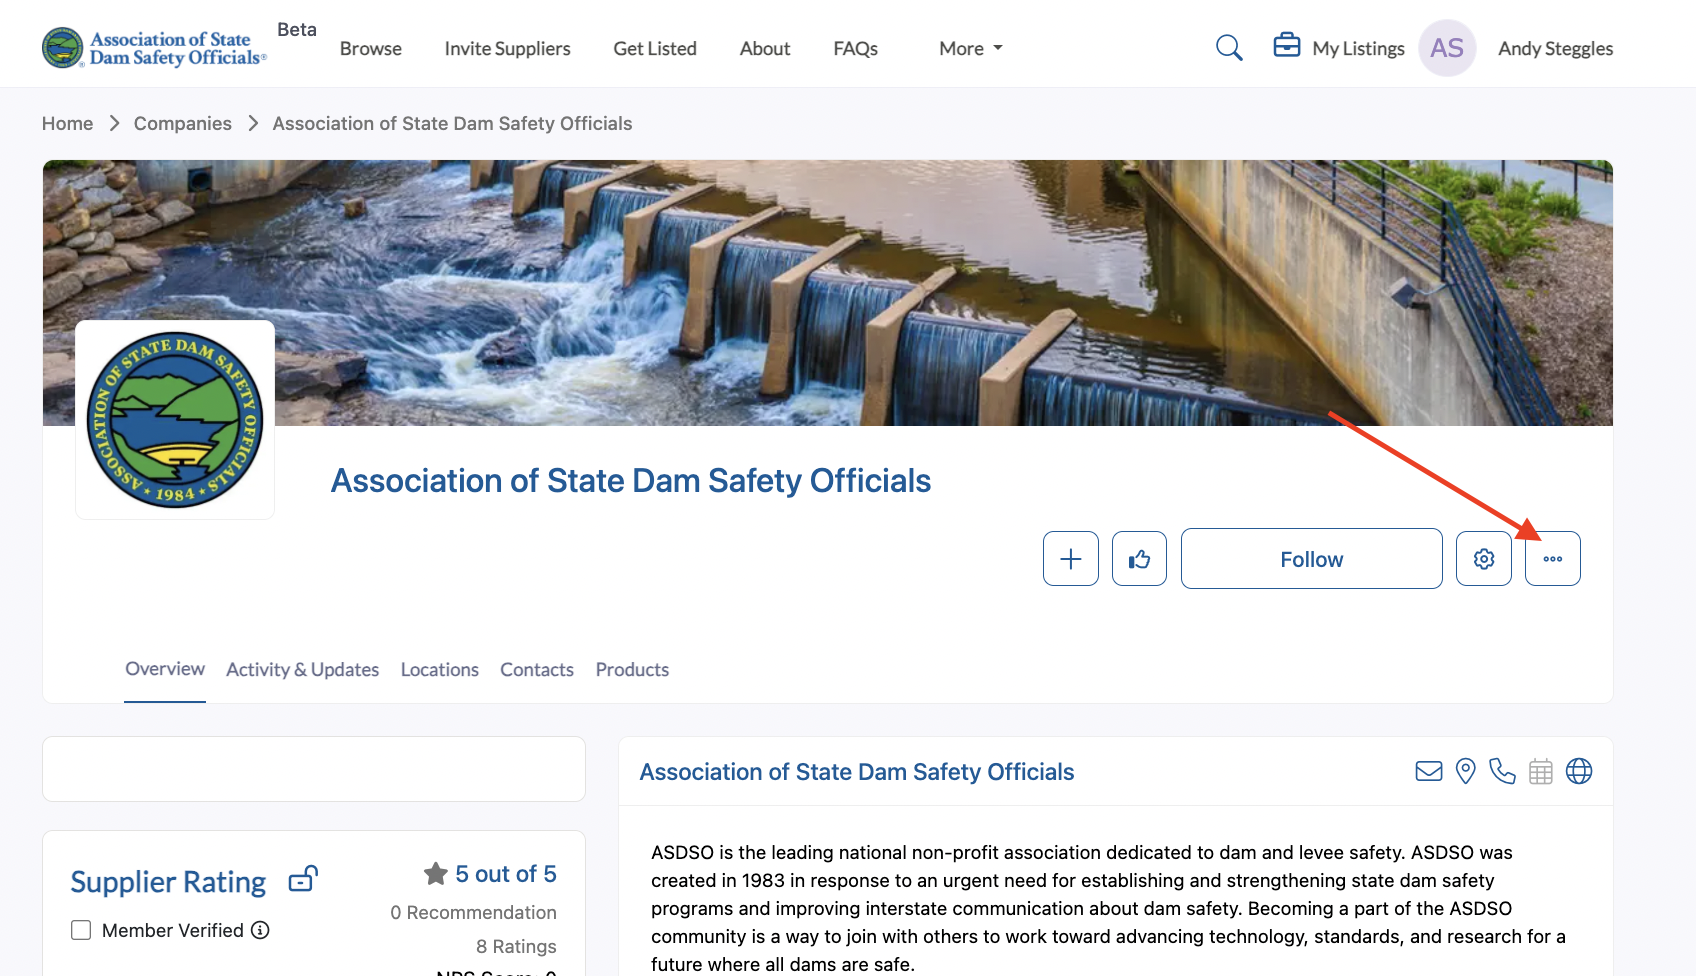
Step 1. Locate the company details section on your listing overview page.
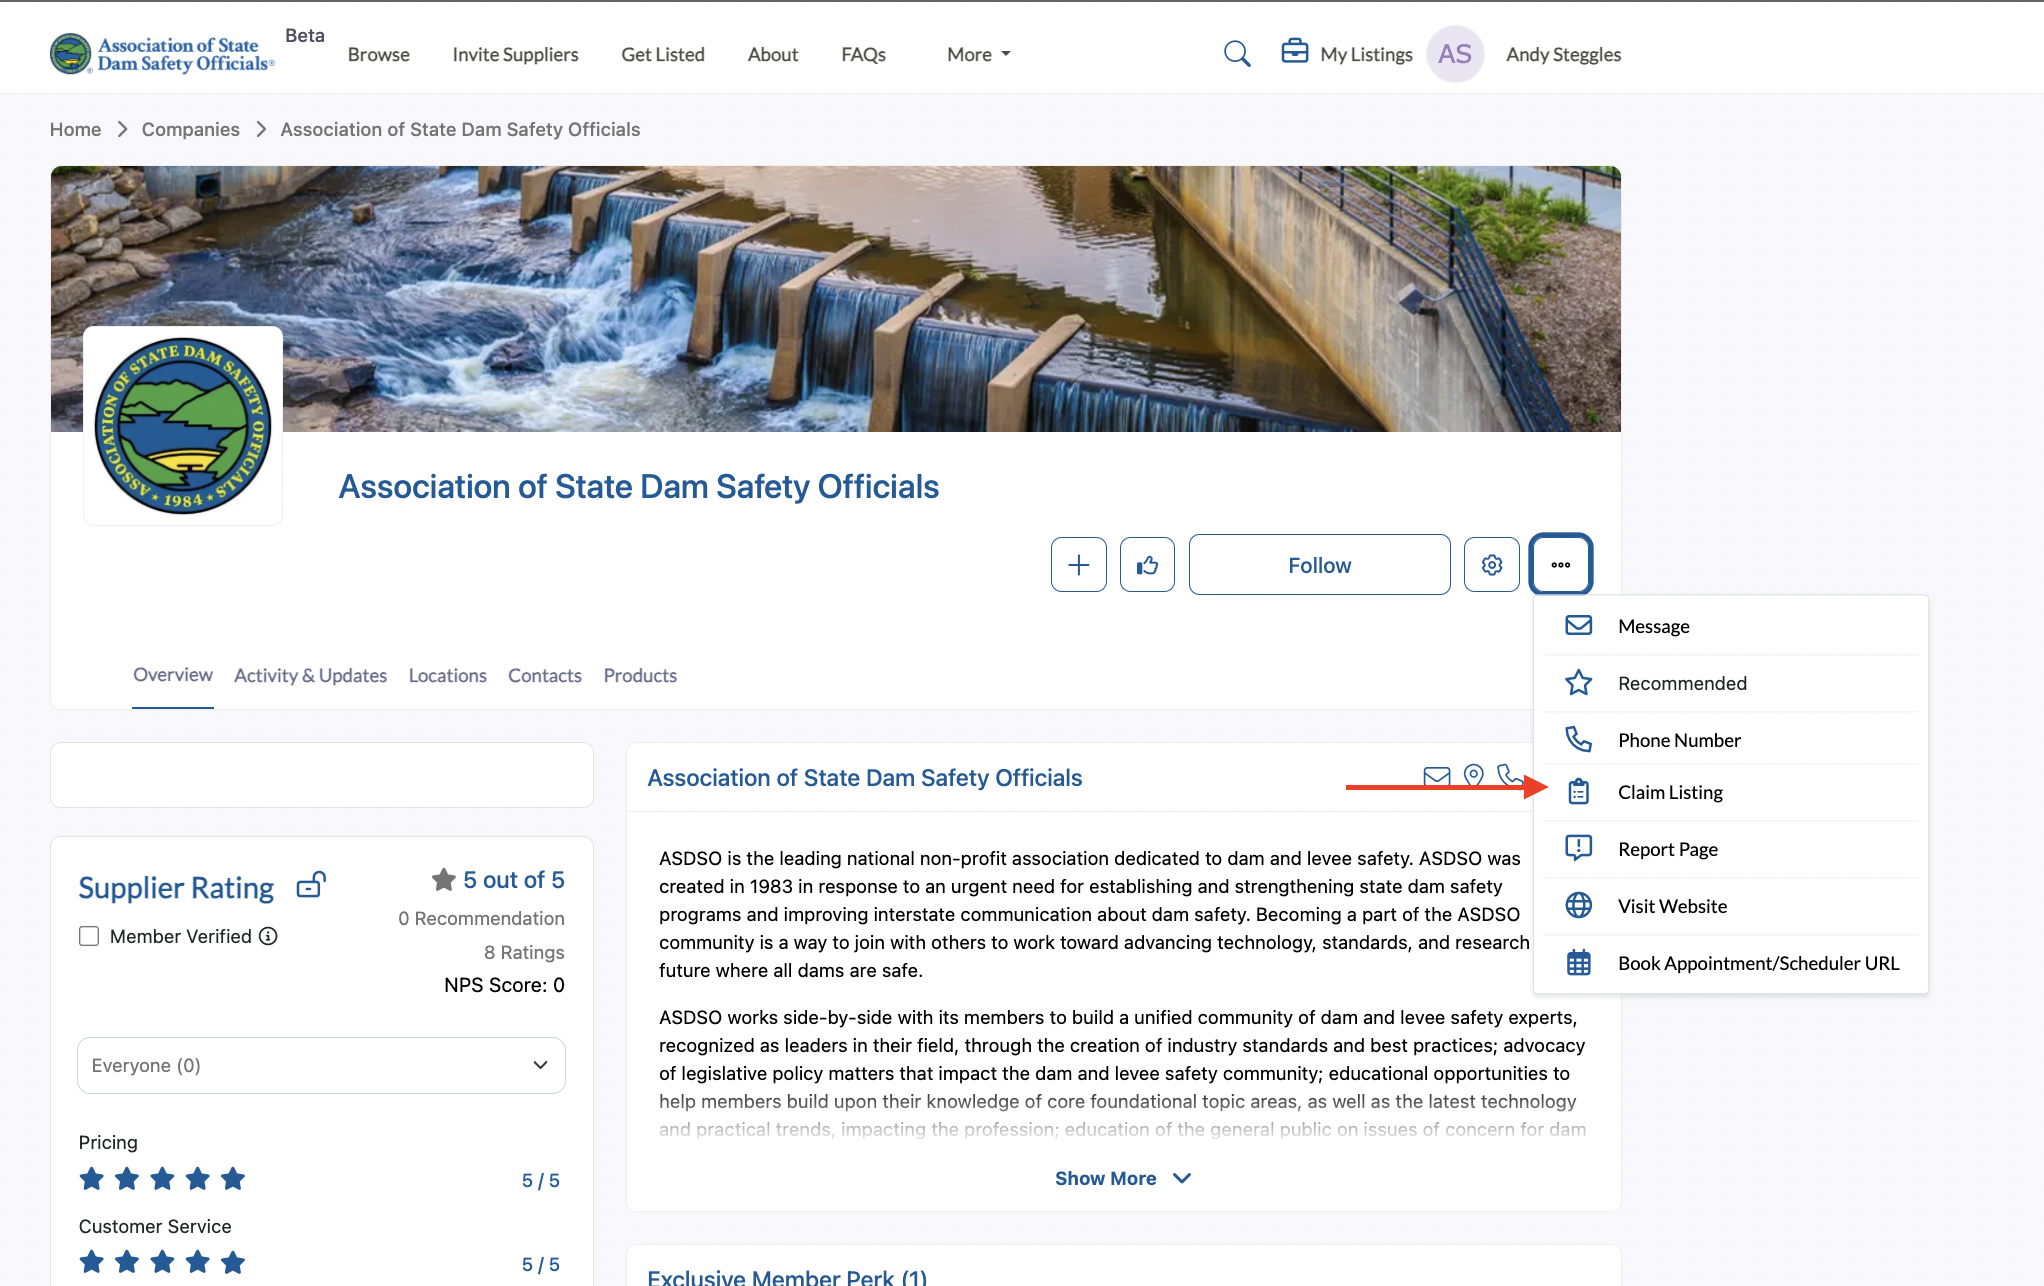
Step 2. Click the Edit icon (pencil icon) next to the company details you want to modify.
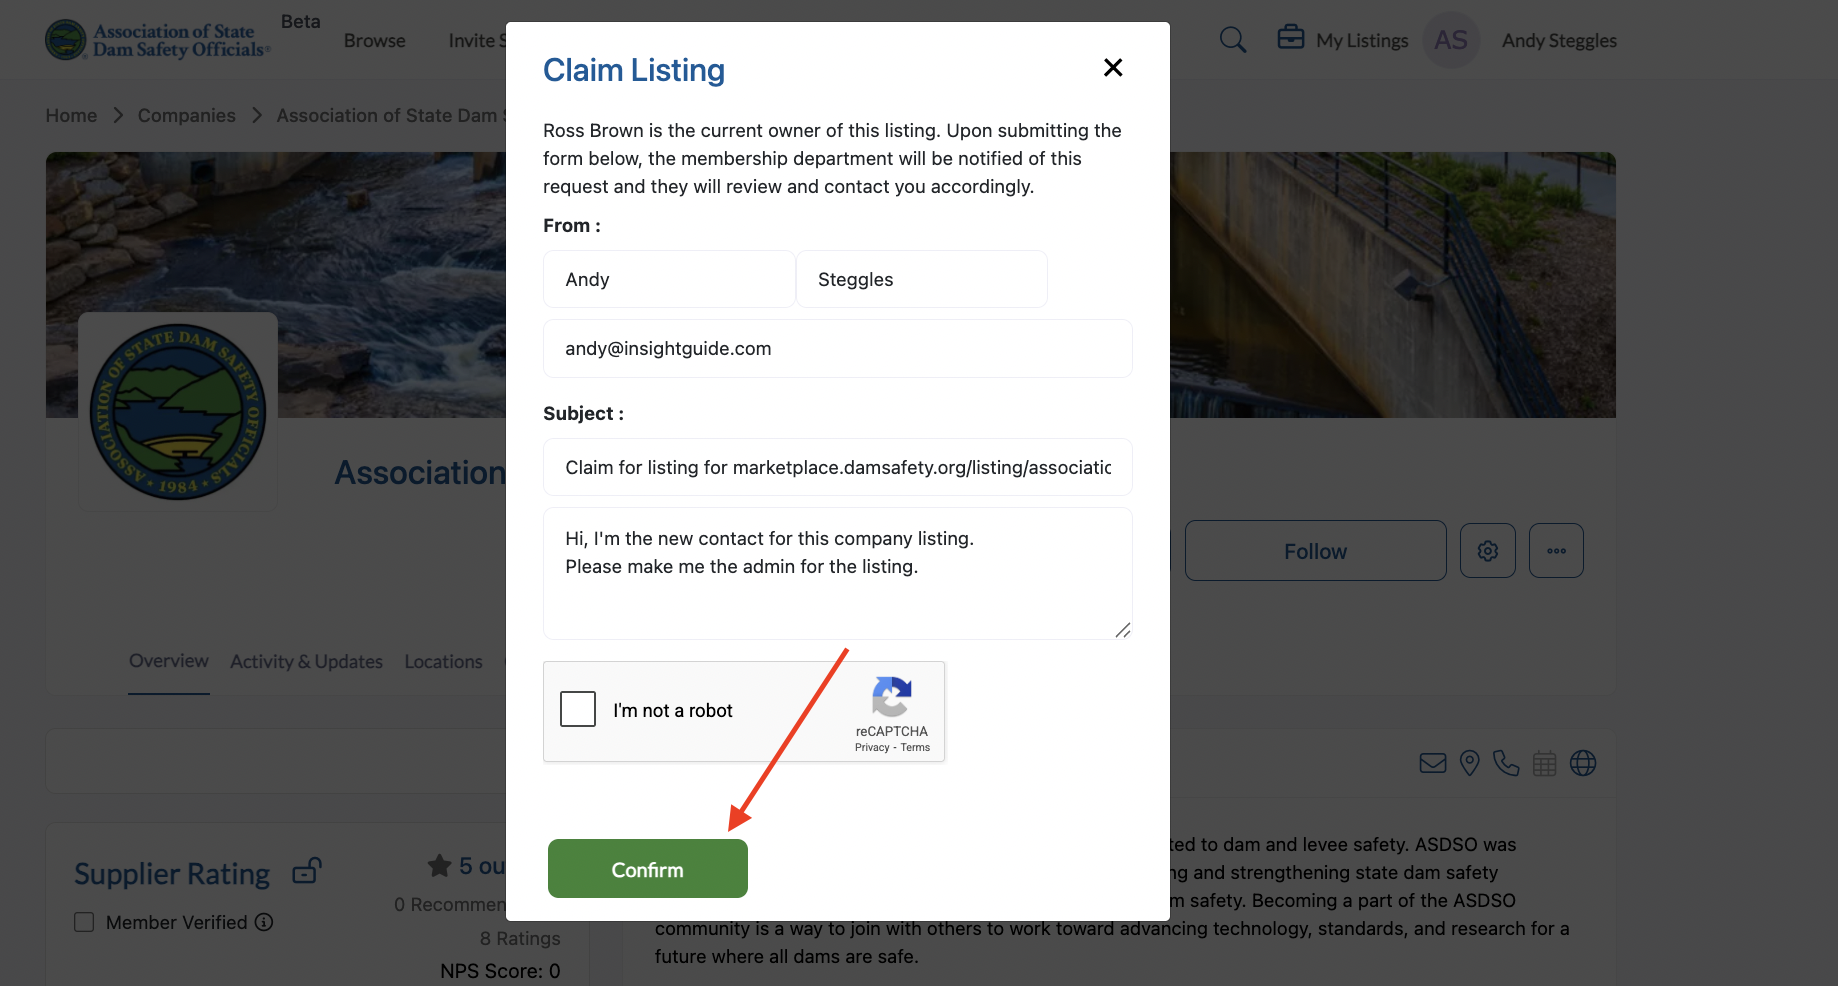
Step 3. Make your desired changes to the editable fields. Note that the company name and email address cannot be modified.
Step 4. Click the Check icon (checkmark) to save your changes.
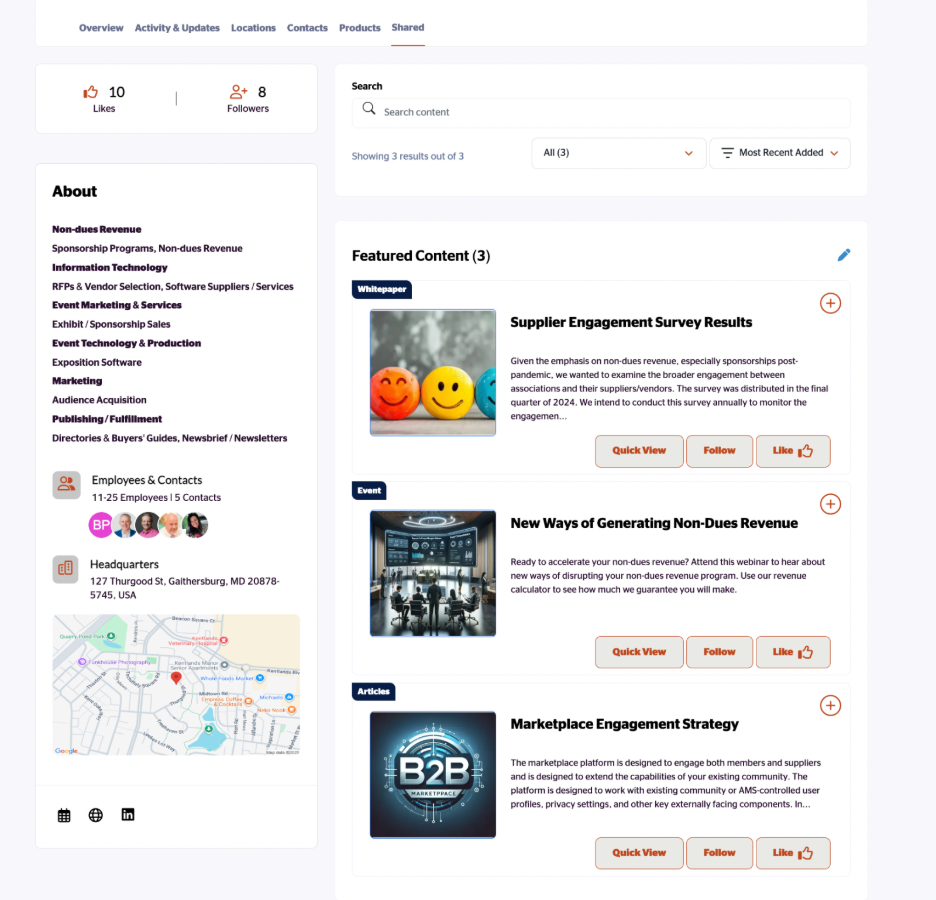
Step 5. Verify that your changes have been successfully updated and are displaying correctly.
Section 2: Updating Company Logo
Your company logo appears prominently on your listing and helps with brand recognition.

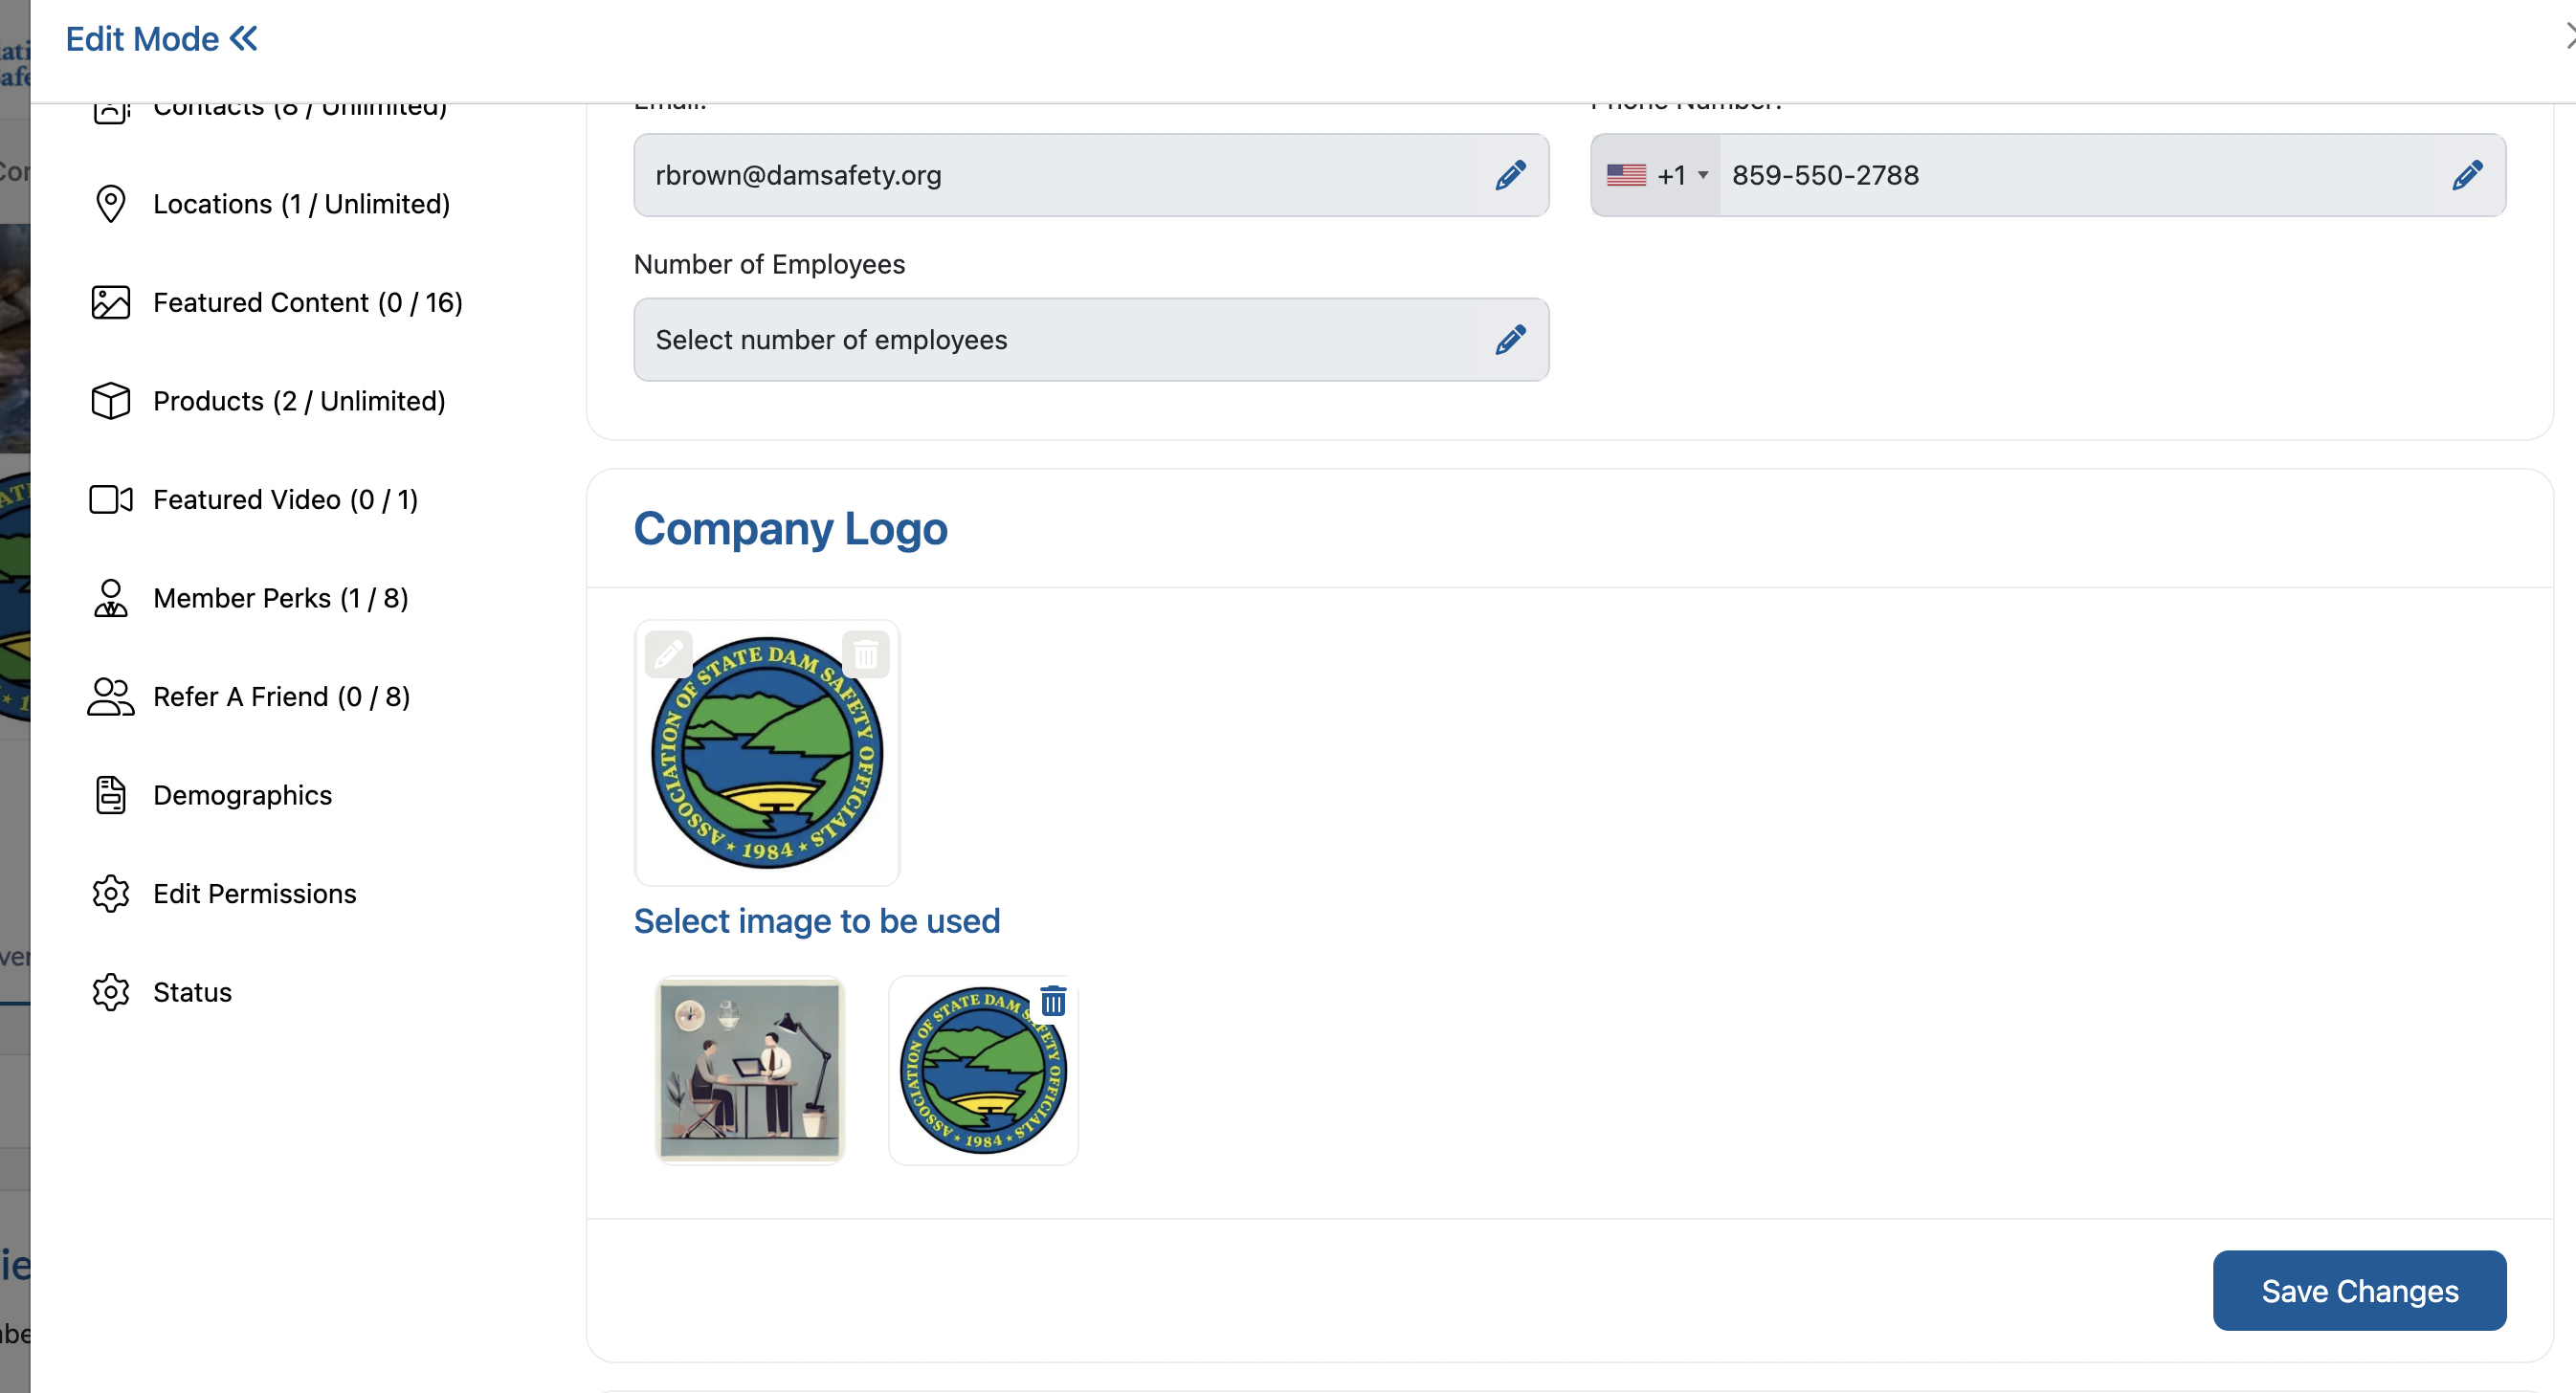
Step 1. Navigate to the company logo section in your listing overview.
Step 2. Click the edit button on the current logo or the "Select Image" button if no logo is currently displayed.
Step 3. Choose one of the following options:
-
Upload a new image: Browse and select an image file from your computer
-
Select from existing images: Choose from previously uploaded images in your media library
Step 4. Once you've selected or uploaded your desired logo image, click the "Save" button.
Step 5. Confirm that your new logo is displaying properly on the listing.
---
Section 3: Updating Company Cover Image
The cover image serves as the banner for your listing and creates the first visual impression for visitors.

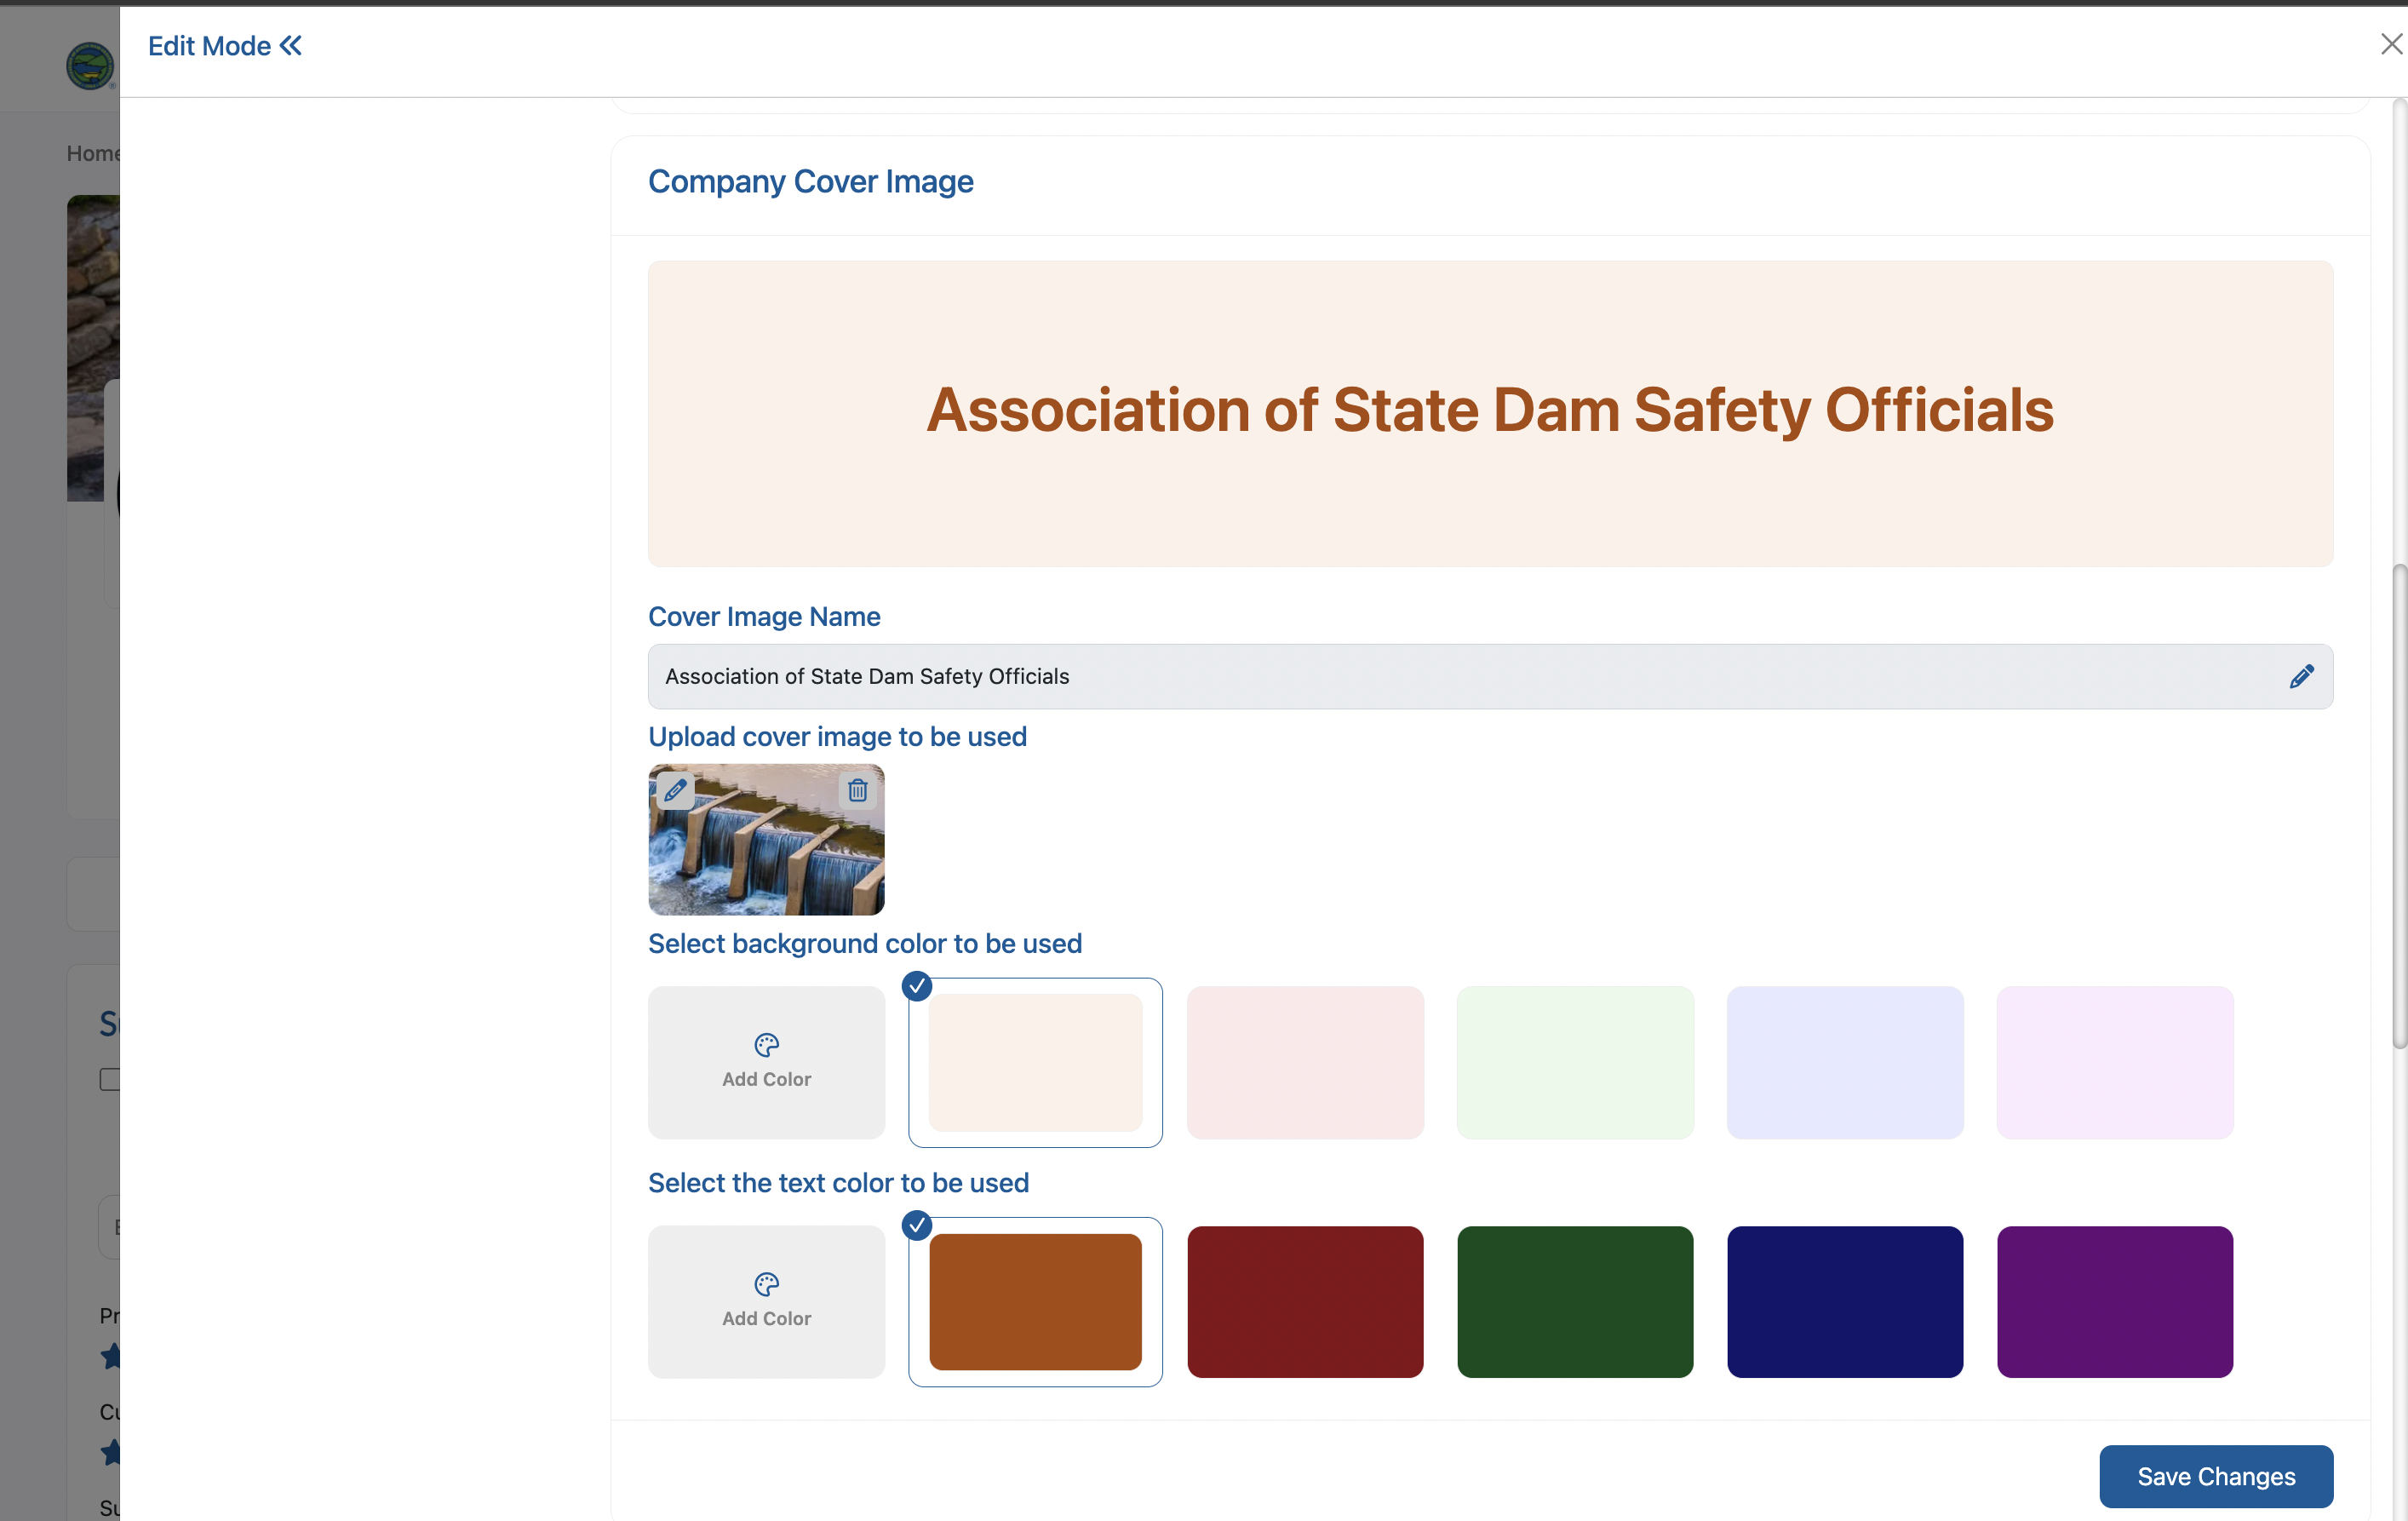
Step 1. Scroll to the cover image section at the top of your listing overview.
Step 2. Click on the current cover image or the "Select Image" button if no cover image is set.
Step 3. Choose your preferred option:
-
Upload a new image: Browse your computer and select a new cover image
-
Select from gallery: Choose from your existing uploaded images
Step 4. After selecting or uploading your cover image, click the "Save" button to apply the changes.
Step 5. Review your listing to ensure the new cover image displays correctly and looks professional.
---
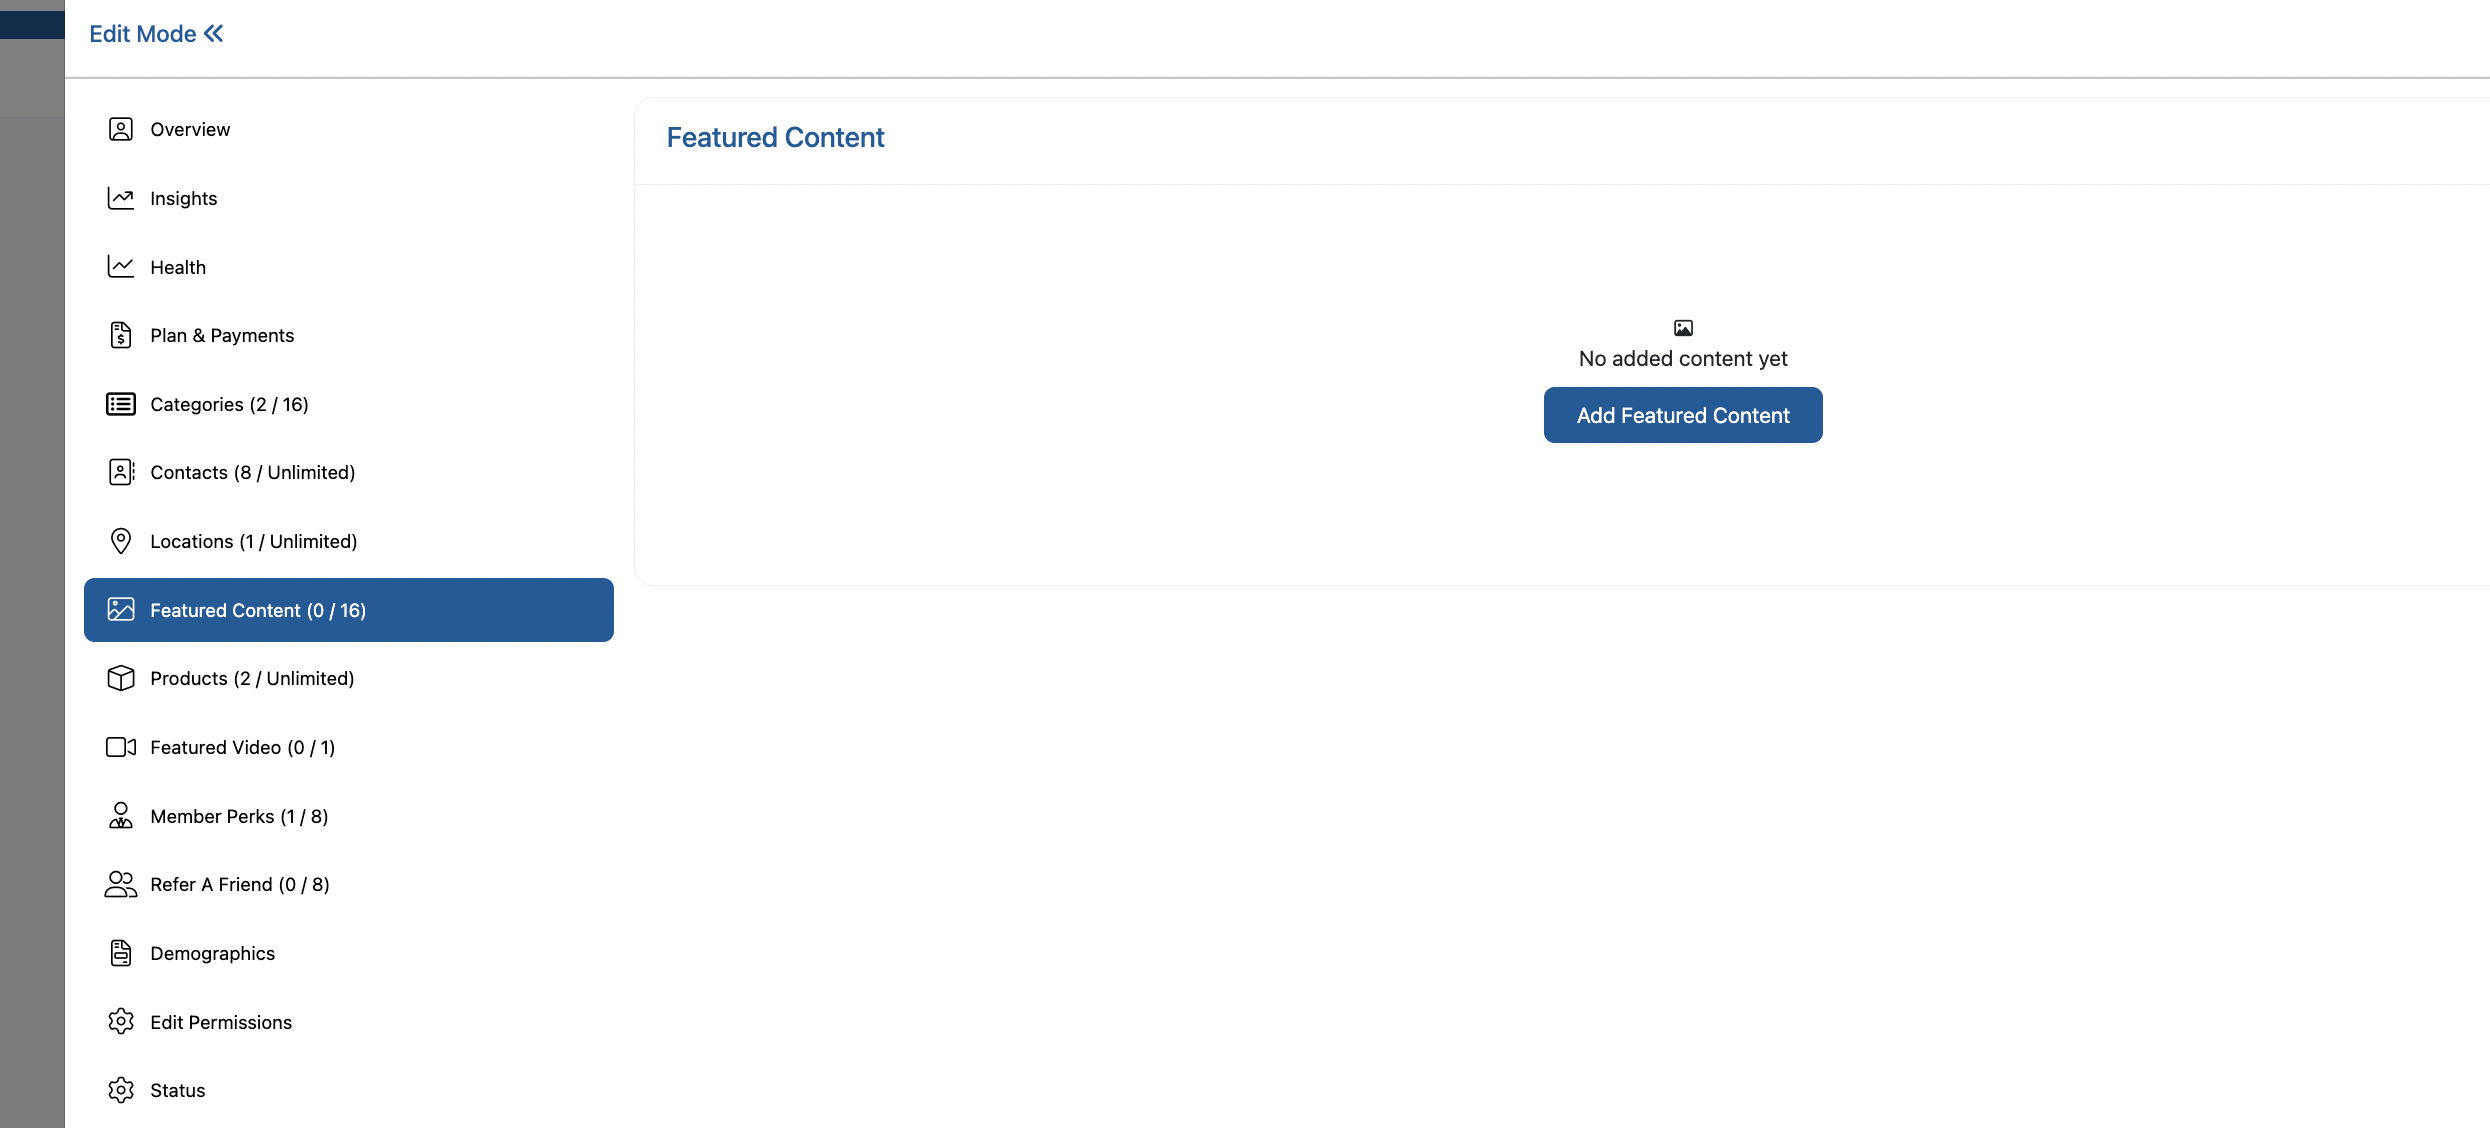
Section 4: Editing Overview Text
The overview text provides a description of your company and services to potential clients.

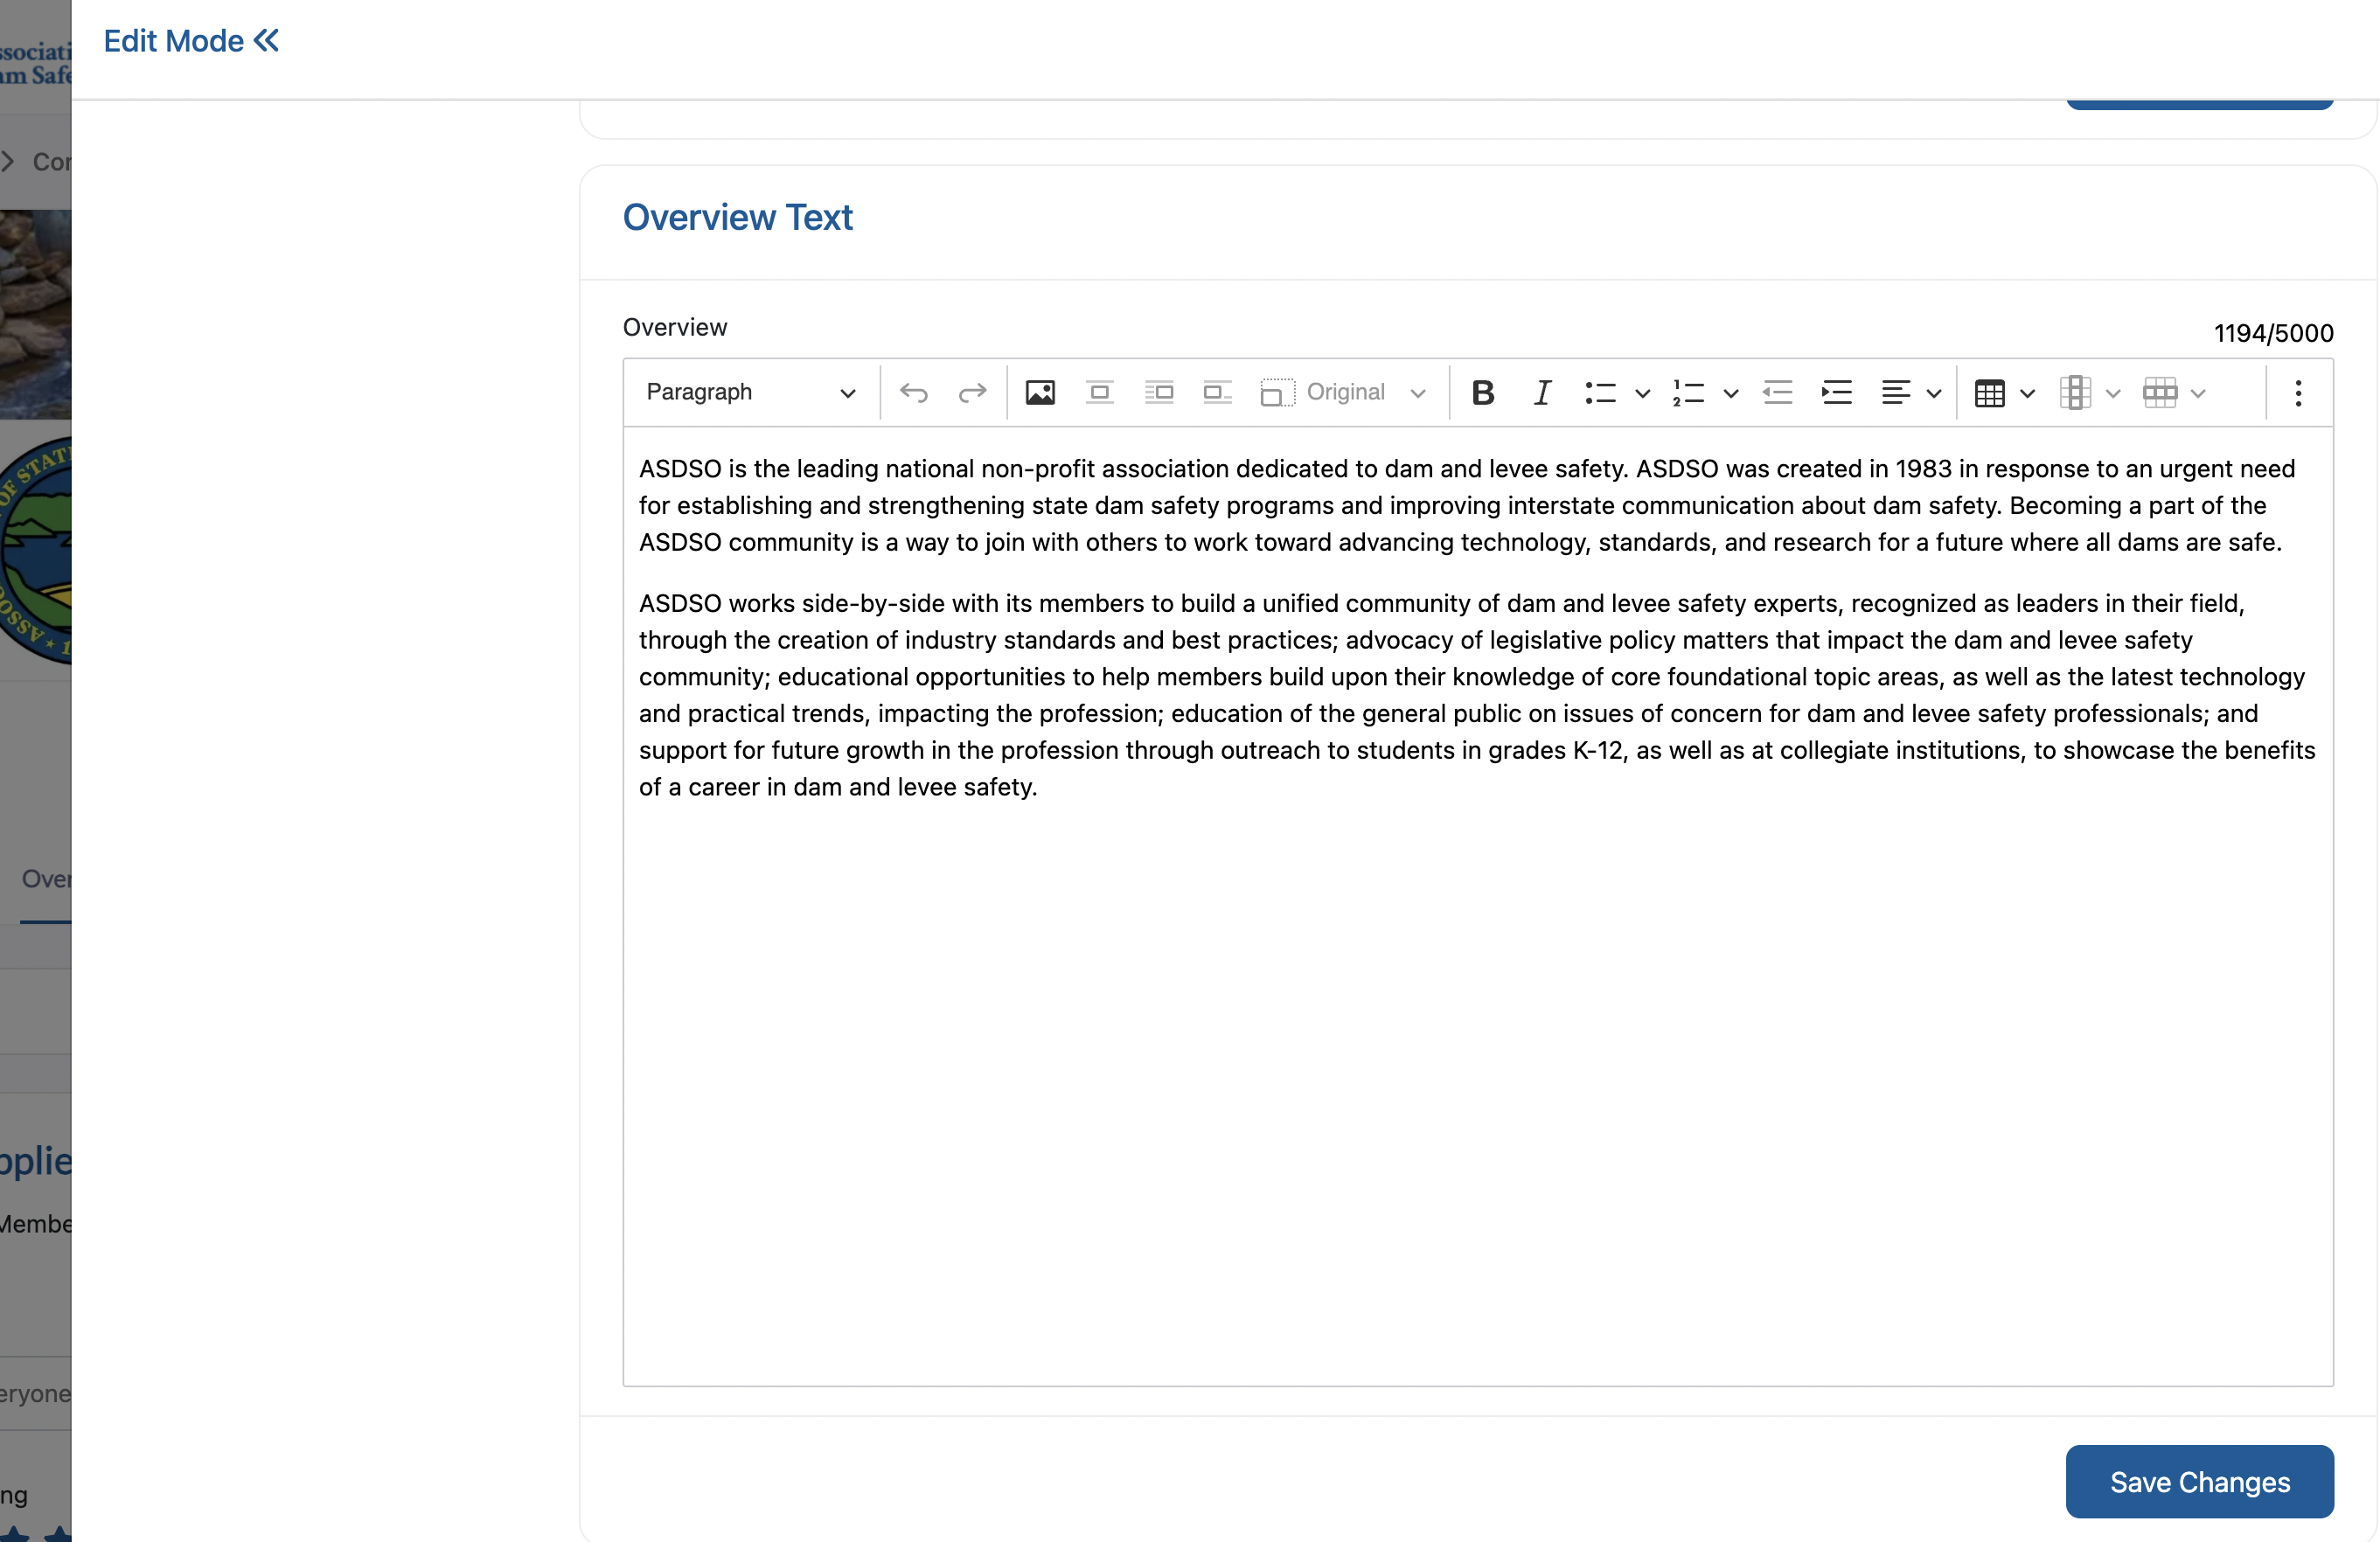
Step 1. Locate the overview text section on your listing page.
Step 2. Click the Edit icon (pencil icon) next to your overview text.
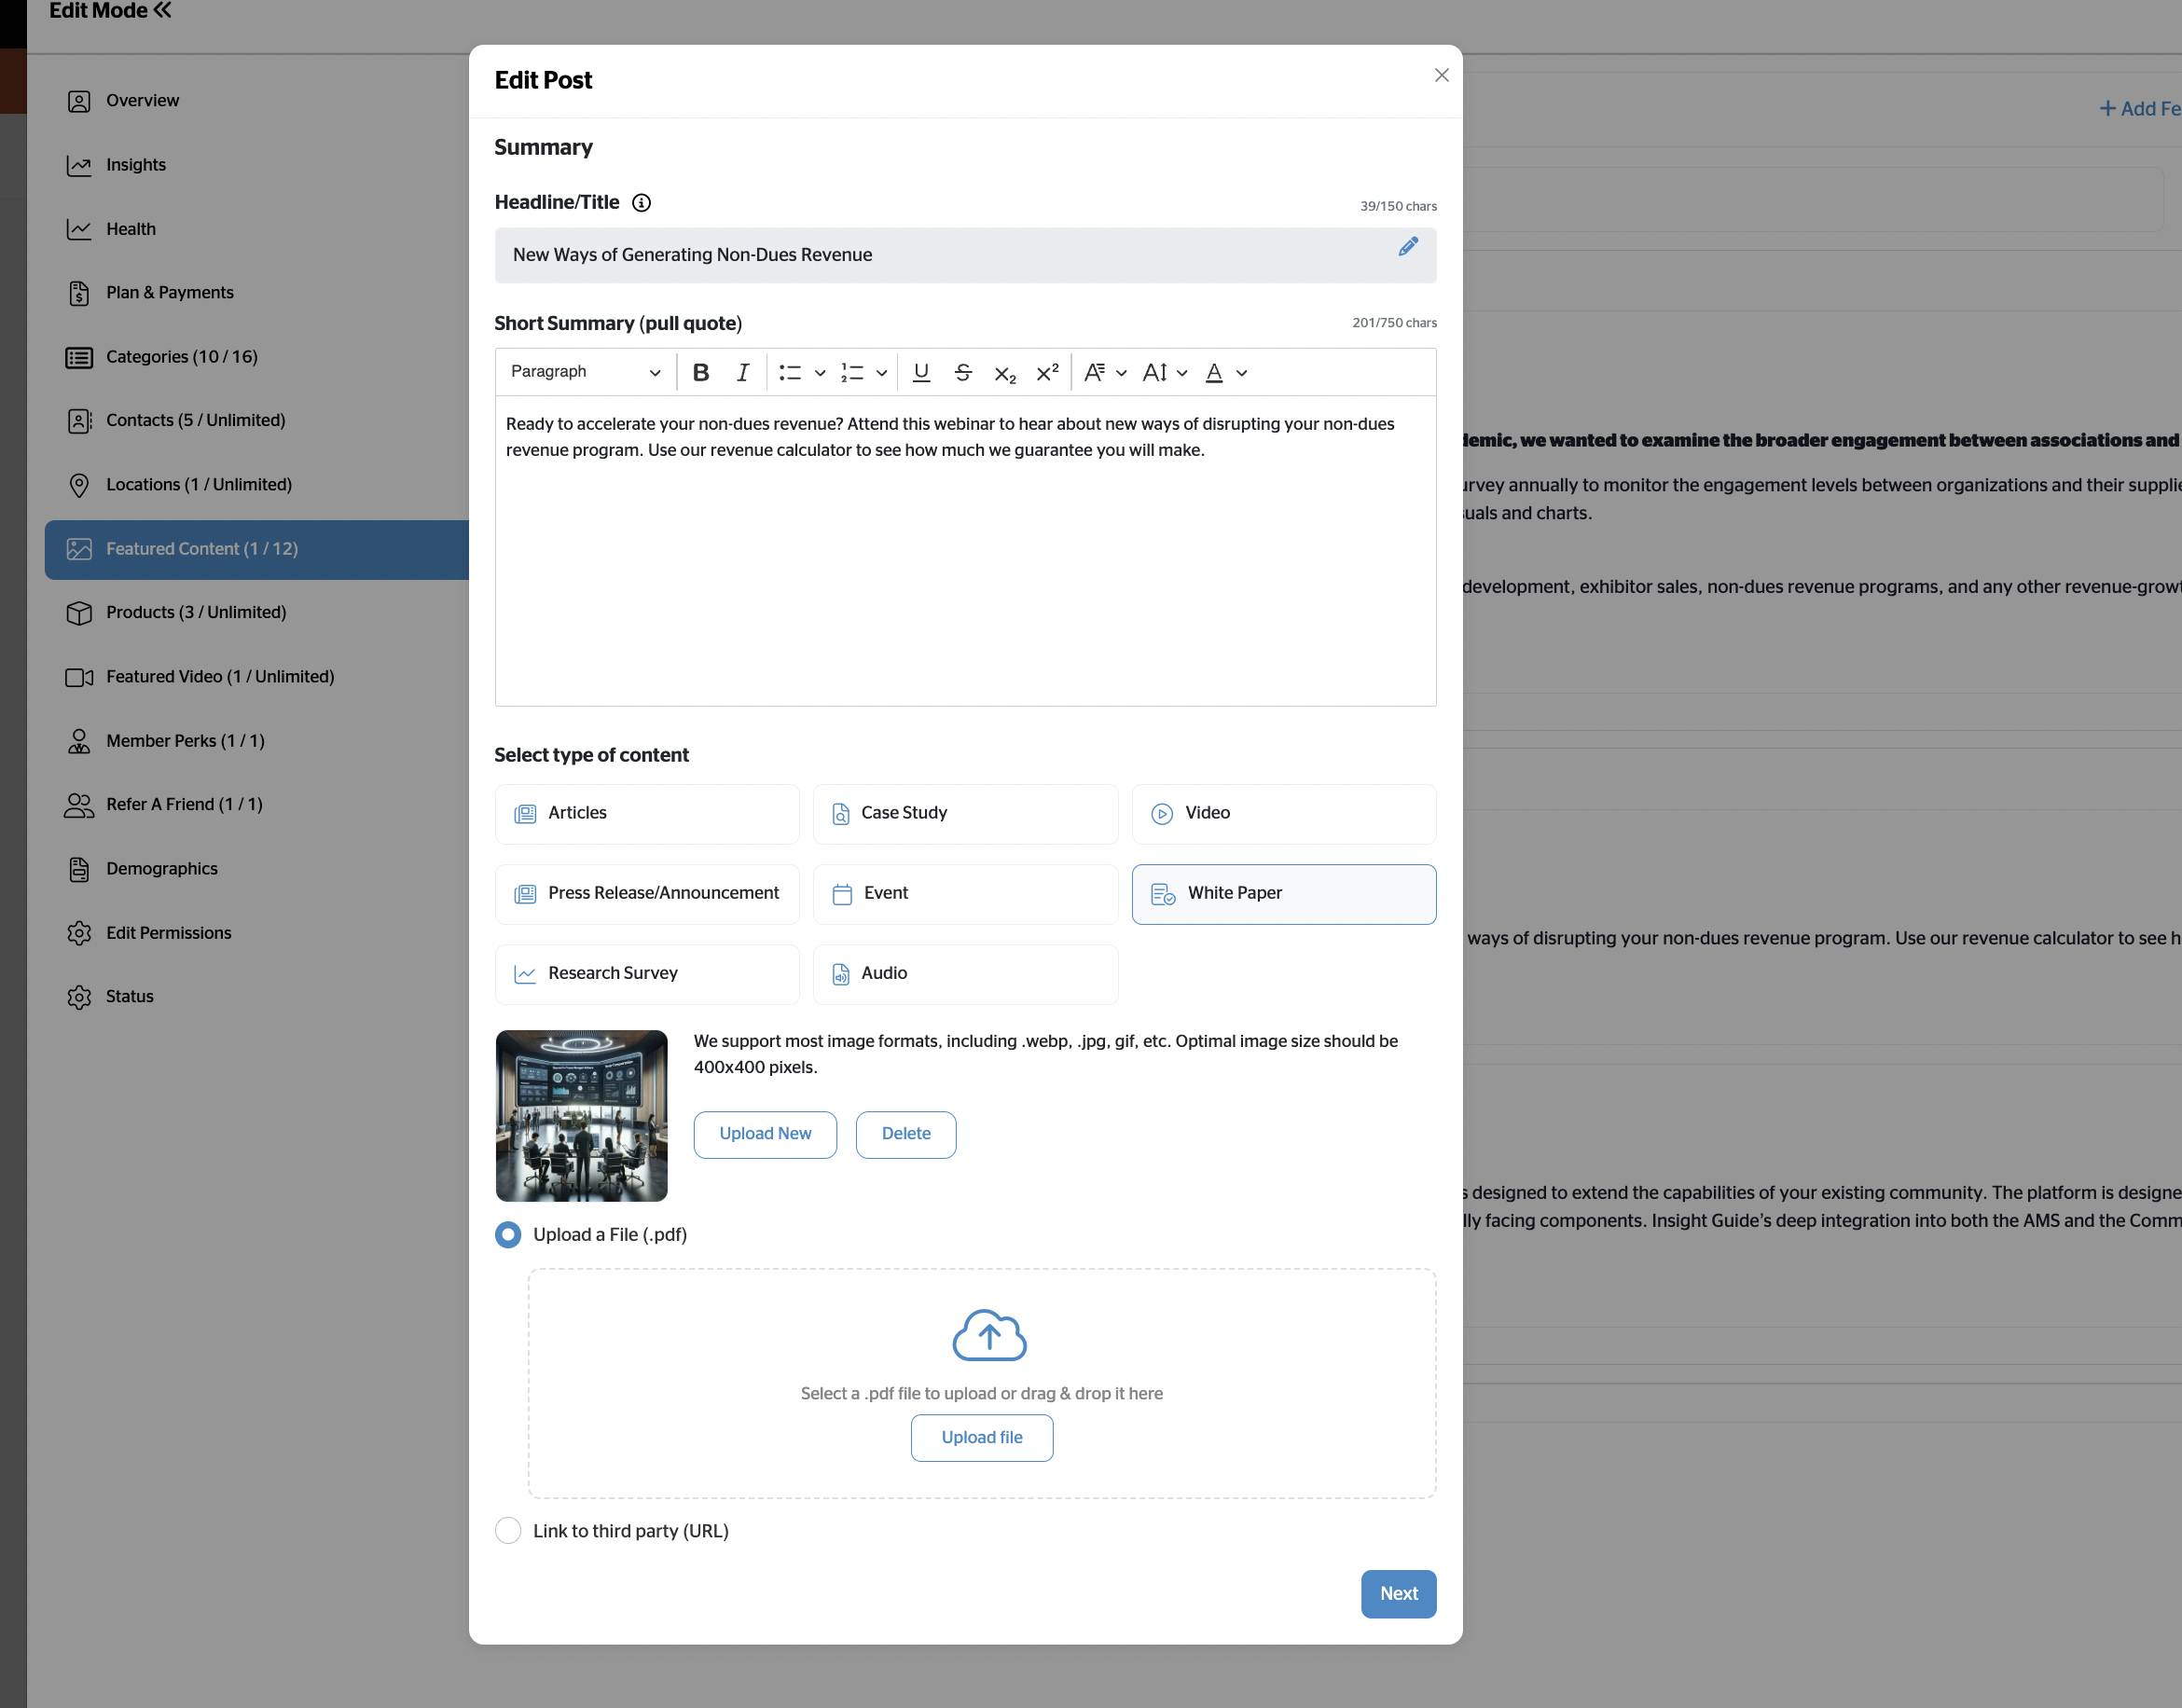
Step 3. Update your overview text with your desired content, highlighting your company's key services, expertise, and value proposition.
Step 4. Click the Save button to save your changes.
Step 5. Review the updated overview text to ensure it displays correctly and effectively represents your business.
---
Section 5: Adding Social Media Links
Connect your social media profiles to your listing to increase engagement and provide additional ways for clients to connect with you.

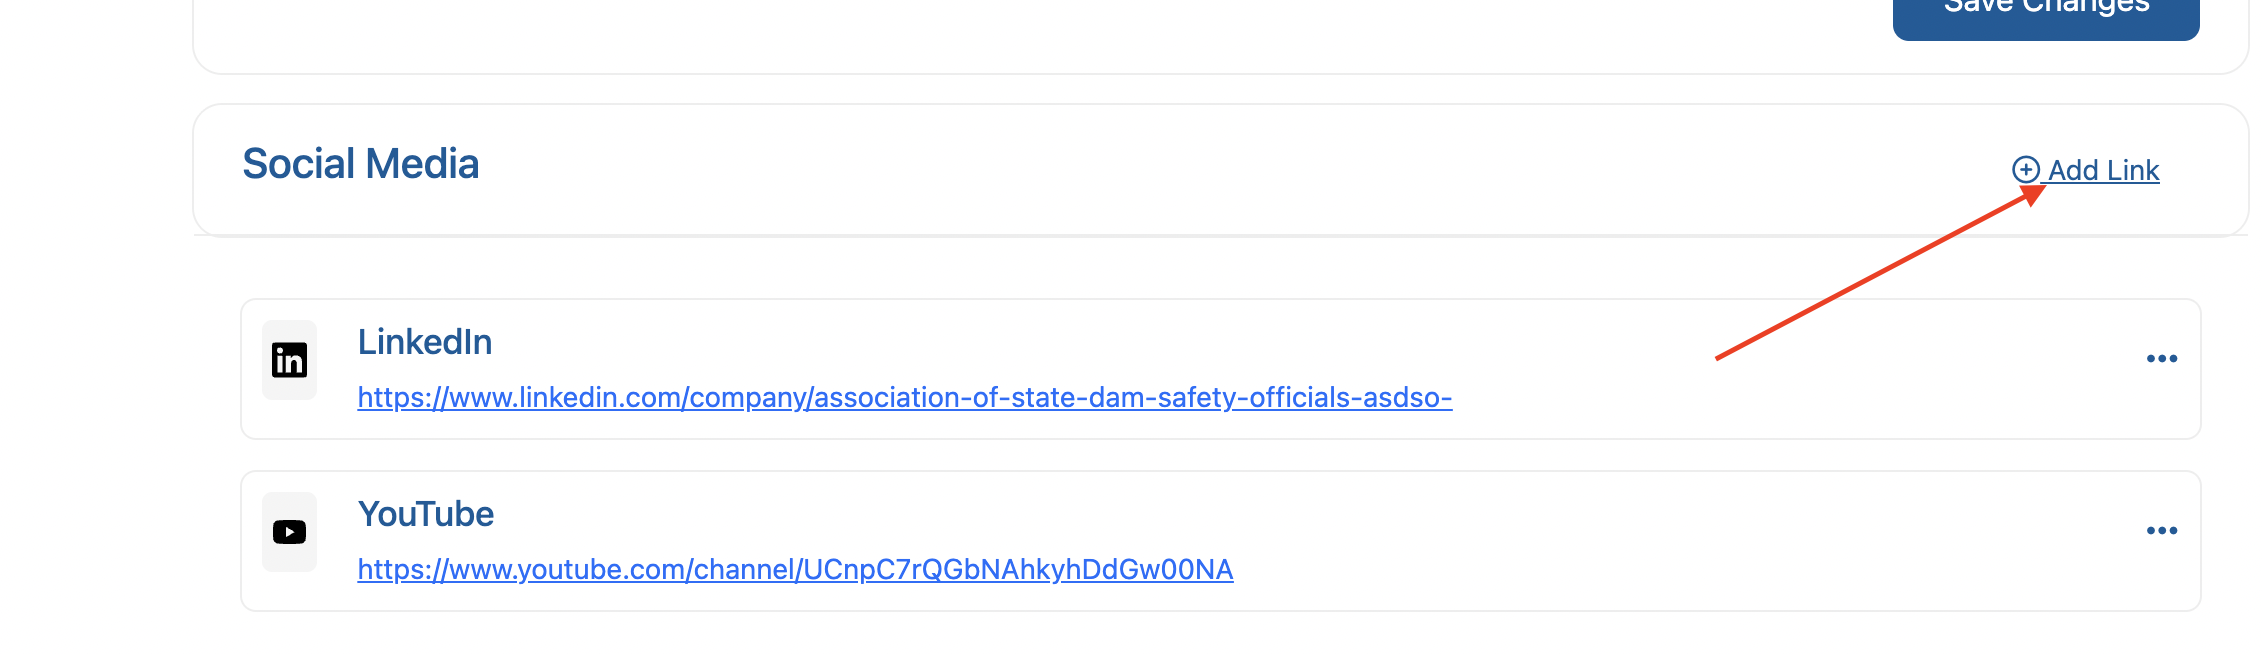
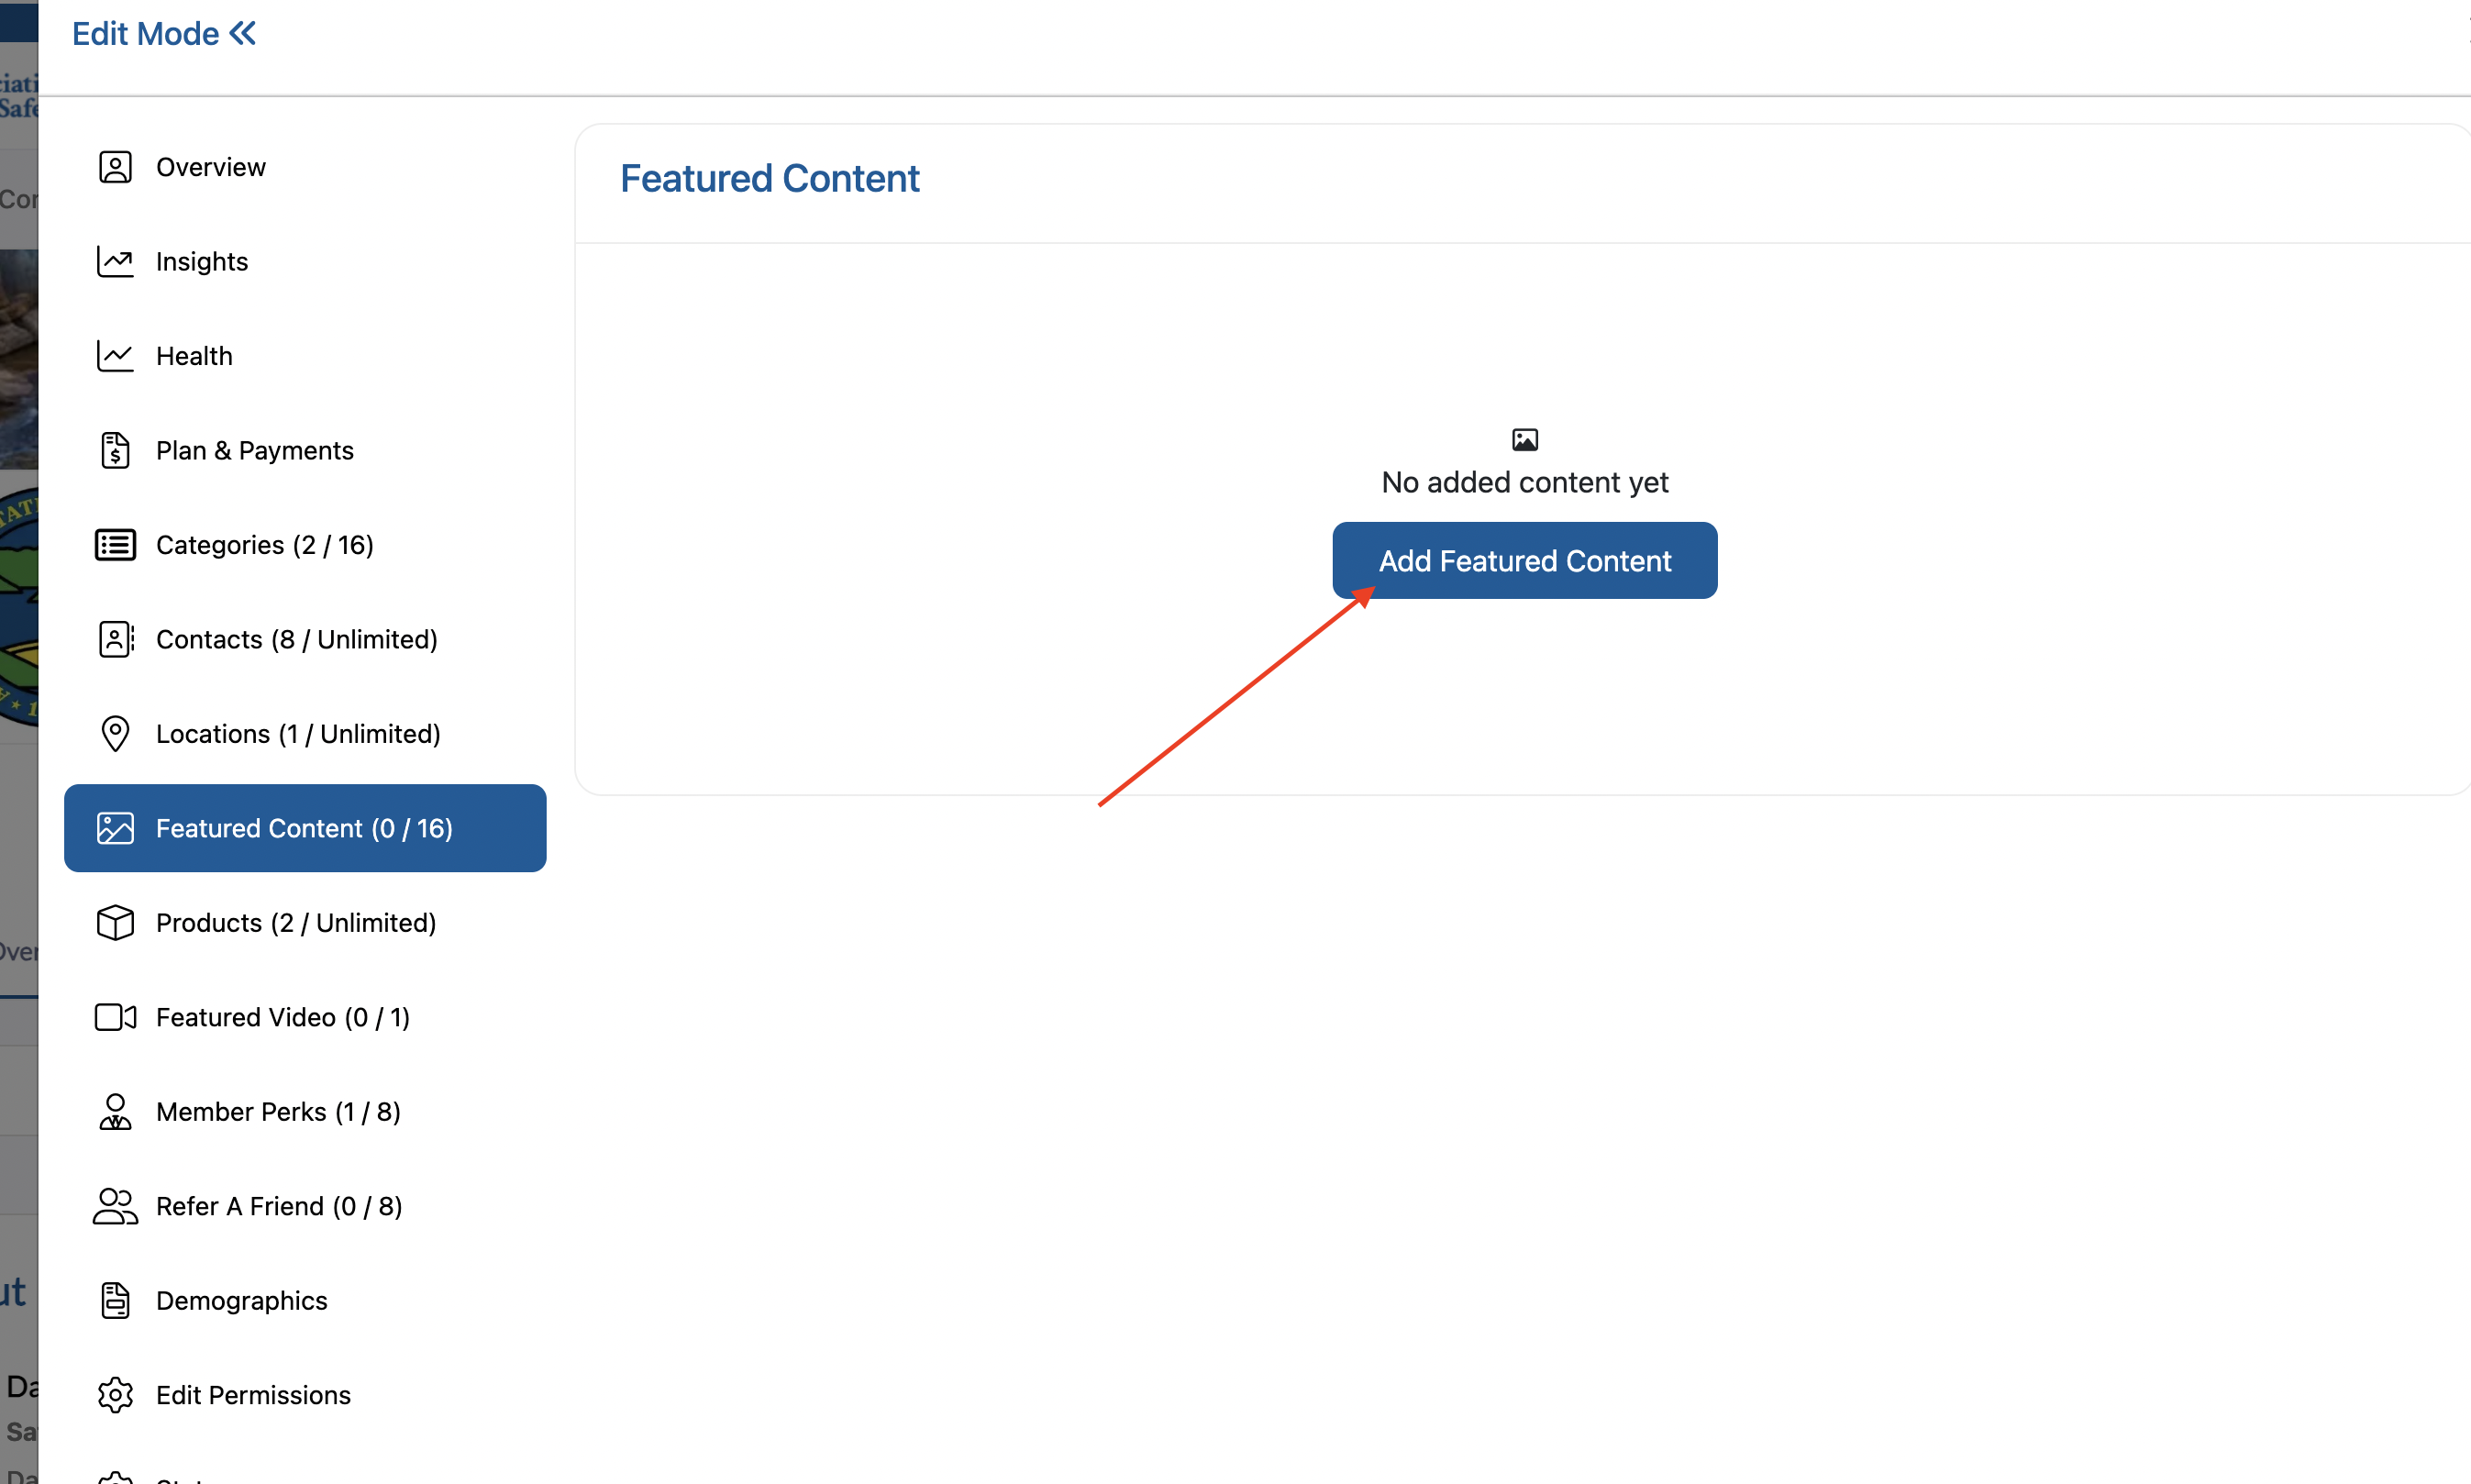
Step 1. Navigate to the Social Media section on your listing overview page.
Step 2. Click the "Add Link" hyperlink text to add a new social media profile.
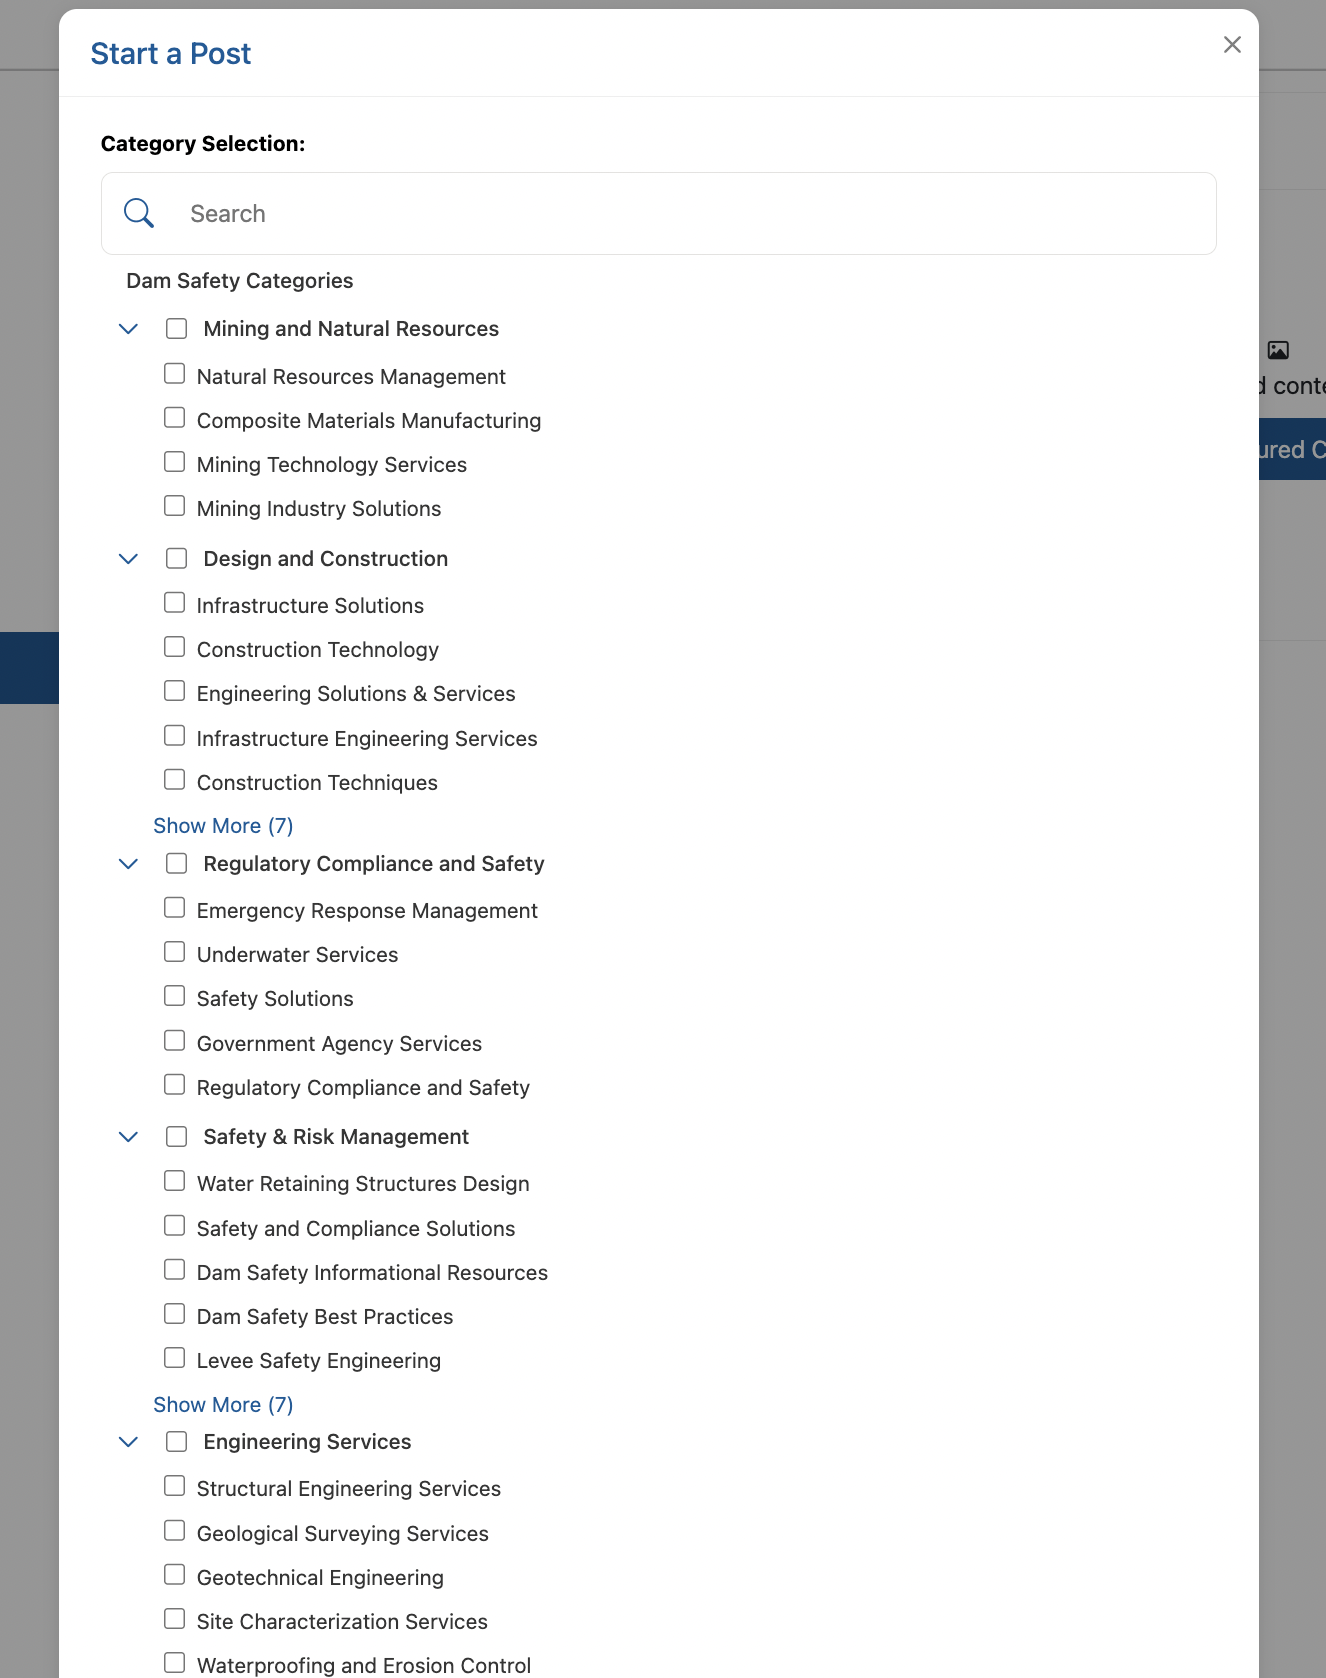
Step 3. Enter the URL of your social media profile (e.g., LinkedIn, Twitter, Facebook, Instagram).
Step 4. Select the appropriate social media platform from the dropdown menu if available.
Step 5. Click "Save" to add the social media link to your listing.
Step 6. Repeat steps 2-5 for each additional social media profile you want to include.
---
Important Notes:
-
- Non-editable fields: Company name and email address cannot be modified through the overview editing process
-
- Image requirements: Ensure your logo and cover images meet the platform's size and format requirements for optimal display
-
- Save your work: Always remember to save changes after making edits to prevent losing your modifications
-
- Social media URLs: Make sure to use complete URLs (including https://) for your social media links
Your listing overview is now updated with your changes and ready to make a great impression on potential clients and partners!
Upgrading your listing gives you access to enhanced features and greater visibility. Follow these steps to upgrade your listing plan.
Step 1: Access Your Listing Settings
Navigate to your listing page and click the Gear icon (settings icon) to edit and manage your listing.

Step 2: Navigate to the Plan & Payments Tab
Once in the settings menu, locate and click on the "Plan & Payments" tab to access your billing and subscription options.
Step 3: Add Payment Method
If you don't have a payment method on file, you'll need to add one before upgrading.
Step 3a: Click the "Add Payment Method" button in the billing section.

Step 3b: A pop-up window will appear requesting your card information. Fill out all required fields:
-
Card number
-
Expiration date
-
CVV/Security code
-
Cardholder name
-
Billing address
Step 3c: Click "Add Credit Card" to add your payment method to your account.

Step 4: Click the Upgrade Plan Button
Once your payment method is added, click the "Upgrade Plan" button to view available subscription options.

Step 5: Select Your New Plan
You'll be redirected to a page displaying all available subscription plans. Your current plan will be highlighted.
Step 5a: Review the available plans and their features.
Step 5b: To upgrade, click the "Upgrade" button on a plan that is higher than your current plan.

Step 6: Review Plan Details and Options
A pop-up window will appear with detailed information about your selected plan.
Step 6a: Review the plan information and features included.
Step 6b: Add Coupon Code (Optional): If you have a coupon code, enter it in the designated coupon code area.
Step 6c: Add New Payment Method (Optional): If you want to use a different payment method, click "Add New Card" to enter alternative payment information.

Step 7: Review Total Price
Check the total price displayed for your selected plan, including any discounts from coupon codes.
Step 8: Accept Terms and Conditions
Before confirming your upgrade, you must check the box to accept the Terms and Conditions.
Step 9: Confirm Your Upgrade
After reviewing all details and accepting the terms:
-
Verify all information is correct
-
Click the "Confirm" or "Subscribe" button to complete your upgrade
[Image: Screenshot showing the final confirmation button]

Step 10: Upgrade Confirmation
Once your upgrade is processed, you'll receive confirmation that your plan has been successfully upgraded, and you'll have immediate access to your new plan's features.
Important Notes:
-
Payment processing: Your card will be charged immediately upon confirmation
-
Plan activation: New features are typically available immediately after upgrade
-
Billing cycle: Your new plan billing cycle begins from the upgrade date
-
Support: Contact support if you encounter any issues during the upgrade process
Congratulations! Your listing has been successfully upgraded and you now have access to enhanced features to better showcase your business.
Claiming a listing is a simple process that allows you to manage and update your company’s information. Follow these quick steps to manage your listing.
Step 1. Find Your Listing
Use the search bar to find your business listing by name. Select your listing card to view its full details.

Step 2. Find the Claim Your Listing Menu
On your listing page, look for the three-dot menu icon. Click on this menu to reveal a dropdown.

Step 3. Claim Your Listing
From the dropdown, select Claim Listing. A confirmation pop-up will appear informing you that you will become the listing contact.

Step 4. Confirm Your Claim
In the pop-up window, add your information, then confirm to complete the claim process.

Step 5. View Your Claimed Listings
To manage your claimed listing, click on "My Listings" beside your profile icon at the top right corner of the page to view and manage all listings you’ve claimed.

Step 6. Edit and Manage Your Listing
To edit, manage your subscription, view insights, and all the details of your listing, select the gear icon on your listing page.

Managing your listing includes:
Overview:
Edit your company’s profile information, including the logo, text description, cover image, social media, main contact, location, etc.
Health:
View your listing quality score and get tips on how to improve your score for engagement and visibility.
Categories:
Categories help users find your company via the category search. RFPs are also disseminated to respective categories. The more categories you have, the more likely users are to find your company and the more RFPs you are likely to receive.
Payments & Plans:
View and manage your listing’s subscription plan. The higher the plan, the more benefits you receive.
Featured Content:
If your plan allows you content credits, you are able to post content in the form of articles, case studies, event or event recordings, white papers, press releases, or research surveys. Publishing content allows added visibility to your listing and generates leads directly to you for all downloads. Though content can be added at any time, there are 20 days between when content can be published.
Locations:
Determine your listing headquarters and drag and drop active locations.
Contacts:
Allow users to contact you directly via email, phone, scheduler, or location. Create new or drag and drop to determine the list of contacts that display on your listing.
Featured Video:
Upload or use an embed code to add a featured marketing video to your listing profile.
Adding featured content to your listing helps showcase your expertise, case studies, whitepapers, and other valuable resources to potential clients. Follow these steps to add featured content to your Insight Guide listing.
Step 1: Access Your Listing Settings
Navigate to your listing page and click the Gear icon (settings icon) to edit and manage your listing.

Step 2: Navigate to the Featured Content Tab
Once in the settings menu, locate and click on the "Featured Content" tab to access the content management section.

Step 3: Start Adding Featured Content
In the Featured Content section, click the "Add Featured Content" button to begin creating new content for your listing.

Step 4: Select Featured or Non-Featured
Note: Depending on your subscription plan, content can be Featured and distributed to the entire organization. Non-featured content is displayed on the activity stream and also sent to users who have Followed your listings.

Step 5: Complete Content Information Form
After clicking Next, another pop-up window will appear with a form to fill out your content details. Complete all required fields:
Step 5a: Add Headline/Title
Enter a compelling headline or title for your featured content that clearly describes what you're sharing.
[Image: Screenshot showing the Headline/Title input field]
Step 5b: Select Type of Content
Choose the appropriate content type from the dropdown menu (e.g., Case Study, Whitepaper, Article, Video, etc.).
Step 5c: Upload Thumbnail Image
Click to upload an image that represents your content. This image will be displayed as a thumbnail for your featured content.
Step 5d: Add Overview
Write a brief overview or description of your content that explains its value and what readers can expect.
Step 5e: Upload Files/Set Destination
Choose how you want to share your content by selecting one of the following options:
-
Upload File: Upload a document, PDF, or other file directly
-
URL: Provide a link to external content
Step 5f:
After completing all the content information, click the "Next" button to proceed to category selection.

Step 6: Select Content Categories
On the next screen, you'll see category selection options to help organize and categorize your featured content.
Step 6a: Browse through the available categories and select the ones that best match your content.
Step 6b: Check the boxes next to relevant categories to help users find your content more easily.

Step 7: Submit Your Featured Content
After selecting the appropriate categories:
Step 7a: Review all your entered information to ensure accuracy.
Step 7b: Click the "Submit" button to add the featured content to your listing.

Step 8: Verify Content Addition
Return to your Featured Content tab or listing overview to confirm that your new featured content has been successfully added and is displaying properly.

Best Practices for Featured Content:
-
Compelling Headlines: Use clear, descriptive titles that grab attention
-
High-Quality Images: Upload professional, relevant images for better visual appeal
-
Detailed Overviews: Write informative descriptions that highlight the value of your content
-
Proper Categorization: Select accurate categories to improve discoverability
-
Regular Updates: Keep your featured content fresh and current
-
Value-Focused: Share content that demonstrates your expertise and provides value to potential clients
Content Types You Can Feature:
-
Case studies and success stories
-
Whitepapers and research reports
-
Industry insights and articles
-
Video presentations and demos
-
Infographics and visual resources
-
Webinar recordings
-
Product documentation
-
Testimonials and reviews
Your featured content is now live on your listing and will help demonstrate your expertise to potential clients!
Configuration Settings
There were no global configurations
There were no listing caption configurations